Today we’re joined by Cody Lindsay, who will be teaching us all about making CBD salve and capsules using his Ardent FX!
Who is the Wellness Soldier?
Chef Cody Lindsay, otherwise known as the Wellness Soldier, is a cannabis advocate, father, chef, and Canadian military veteran. Cody developed significant culinary skills during his time in the military, where he primarily served as a chef, and used his training to help boost morale within his unit. After completing two tours, one of which was in Afghanistan, Lindsay returned home, and like many veterans, he used cannabis (in lieu of harsher pharmaceuticals) to cope with the hardships of reassimilating to life as a civilian.
With years of experience self-medicating with cannabis and experimenting with food, Cody Lindsay quickly became an expert in using the plant at home. Here we share his CBD salve recipe as well as how he makes CBD capsules!
CBD Salve Recipe
https://vimeo.com/515931219
Ingredients
1 gram of CBD isolate
5 oz of coconut oil
1 oz beeswax
A few drops of essential oil (he uses lavender but you can use whatever you prefer)
Directions
Preheat the FX to the bake setting.
Add five parts coconut oil to one part beeswax in the FX, all it to meltdown, then add your CBD isolate and the essential oils of your choosing.
Pour your mixture into a jar and allow it to cool.
Enjoy as needed!
How to Make your Own CBD Salve
As Cody Lindsay demonstrated, it’s ultra easy to make your own CBD Topicals using the Ardent FX. Cody prefers using CBD isolate because there’s no cannabis smell in the final product; however, depending on your needs, you may want to opt for using other starting materials. You can also make THC salve or a blend of both! Find some options below:
THC or CBD distillate – does not need to be decarboxylated
CBD Hemp Flower – naturally full-spectrum, should be decarboxylated
THC concentrates – like shatter, live resin, hash rosin, etc., should be decarboxylated
A combination of full-spectrum hemp flower with some CBD isolate tossed in to increase the amount of CBD in the final product
Any ratio of CBD:THC material that works best for you
When choosing essential oils for your salve, you might want to consider something that either compliments or masks the smell of cannabis, or something that provides a heating or cooling sensation for pain. Find some options below:
Peppermint
Lavender
Cinnamon
Capsaicin
Eucalyptus
Bergamot
Rosemary
Ginger
Lemongrass
You can find our favorite CBD topical salve recipe, which includes some extra nourishing ingredients for hair, cuticles, and skin, on our blog.
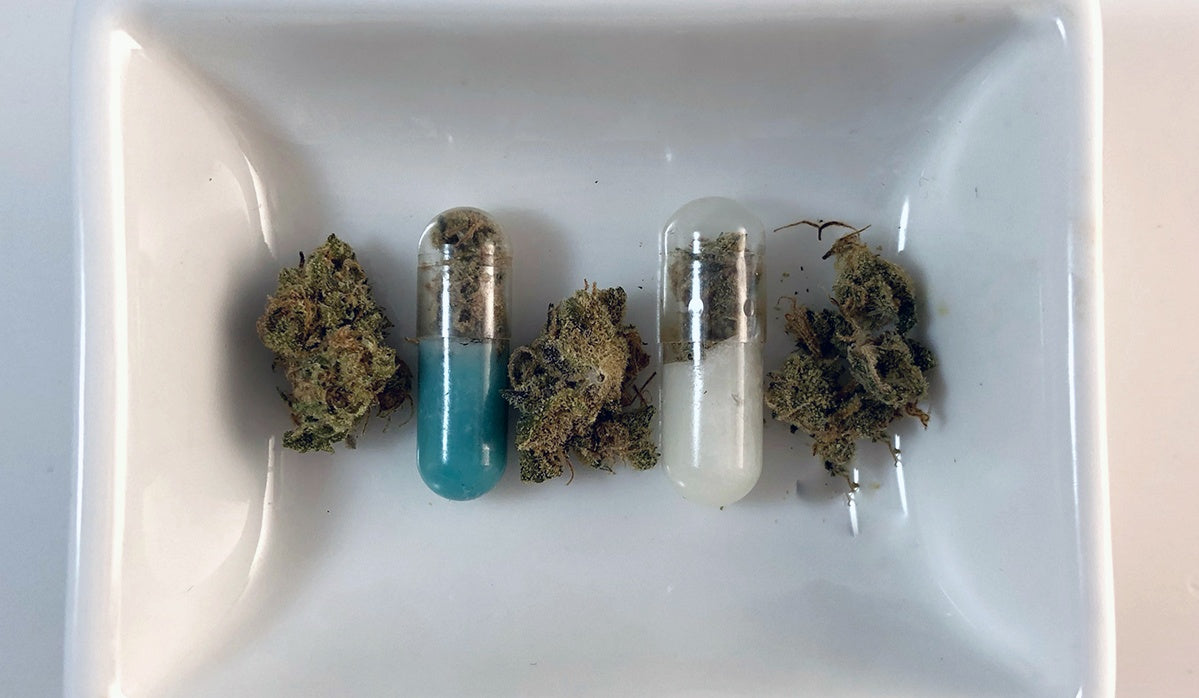
Wellness Soldier’s CBD Canna-capsules Recipe
Ingredients:
Ardent FX
Empty capsules (sizes 00 or 0 will do)
Grinder
1-2 grams of CBD-rich flower (Cody uses Diesel Puff at 15% CBDA)
Directions:
Decarboxylate your CBD-rich flower using the A2 setting. You can also make THC capsules by starting this process with decarb of THC flower on the A1 setting.
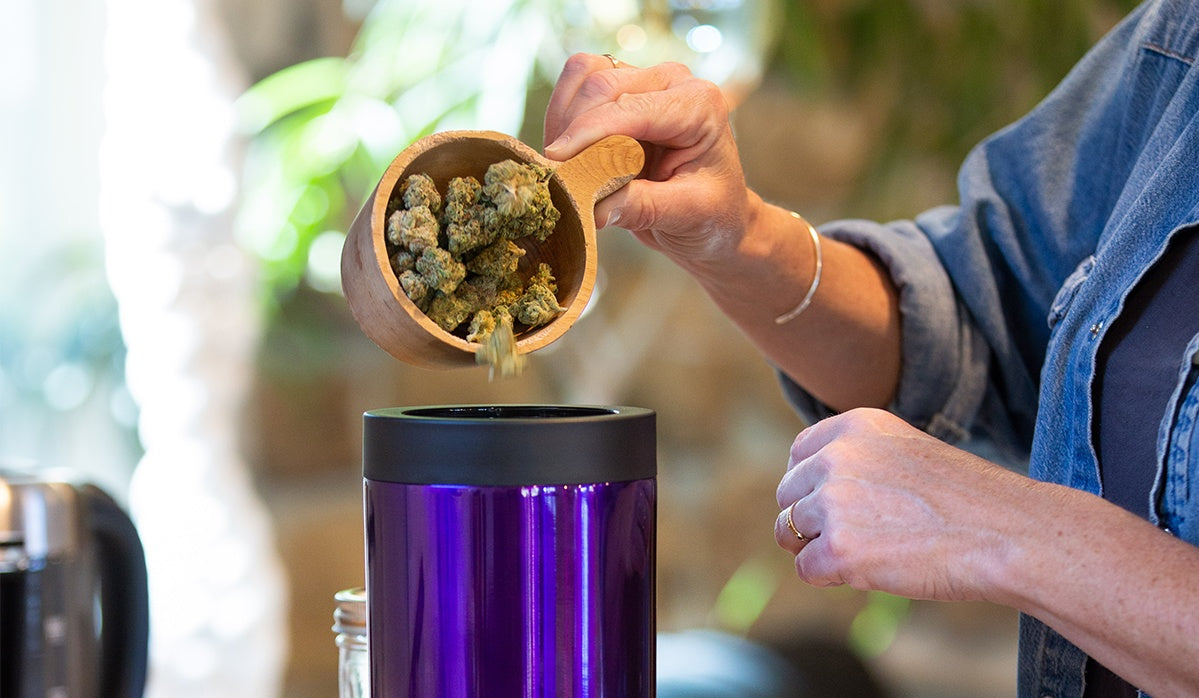
Empty out the Ardent FX’s chamber and finely grind your decarbed flower.
Open the capsule and begin stuffing each one with your hands, a piece of folded paper, a very small funnel, or a machine for filling caps.
Enjoy!
Trying out The Wellness Soldier’s CBD canna-capsules or CBD salve? Tag us on Instagram for the chance to be featured on our page.
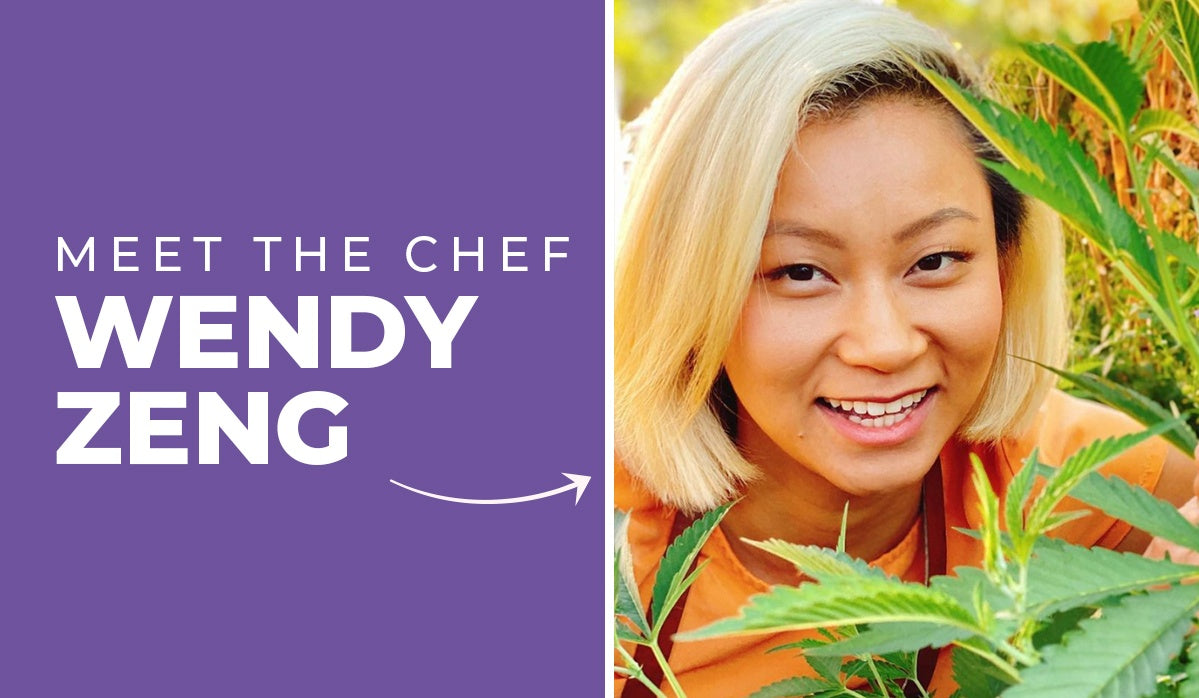
Chef Wendy Zeng was born in the city of Chengdu, China, where she spent her formative years training in her grandfather’s kitchen. Immersed in the flavors and techniques of the Sichuan Province, Wendy mastered the intricacies of the region’s diverse cuisine. At the age of 10, she moved to Memphis, Tennessee, where she discovered Southern BBQ and soul food. She realized that, similar to Sichuan cuisine, Southern food is about family, history, and the dishes that bring us together.
Her culinary style weaves together the flavors and techniques of her familial roots with LA’s local influences. As the host of thematic pop-ups and cannabis-infused supper clubs, she brings the values of her childhood to every table, fostering community among cannabis and food lovers alike.
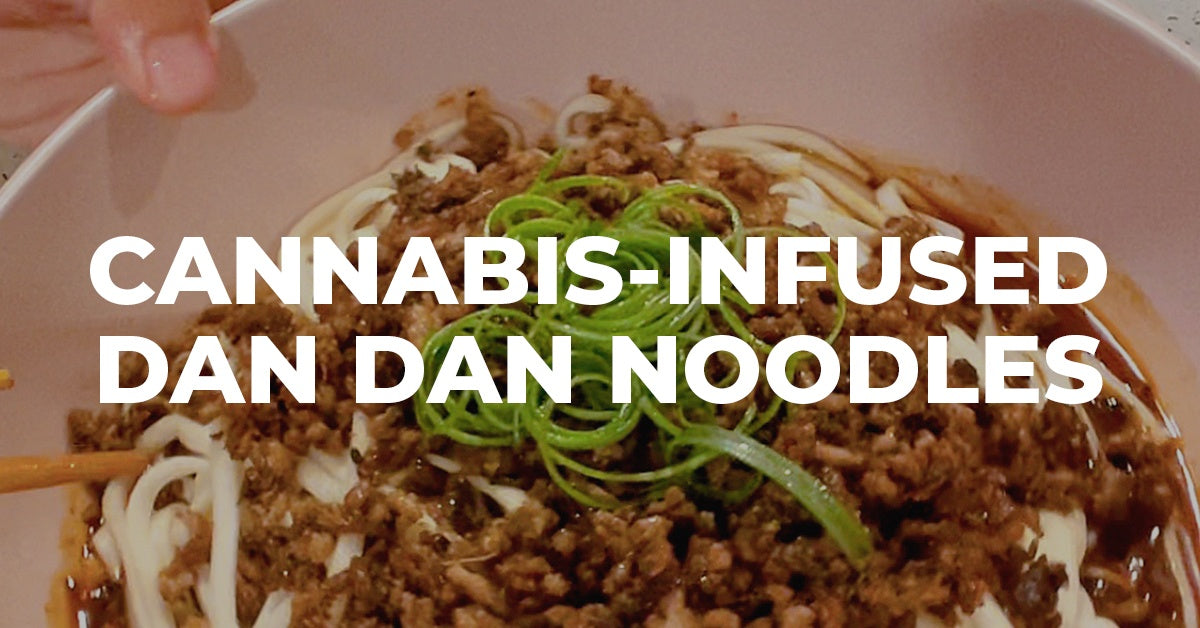
You may recognize her cannabis infused sichuan chili oil we shared during the holiday season, which you can use for her dan dan noodles dish to celebrate Lunar New Year!
Chef’s Note: “Longevity noodles (伊面Yi Mian) is a common dish served during birthdays or new year celebrations as it symbolizes living a long life. Eating the noodles also signifies long term prosperity and good luck. Throughout different regions in China, every family has their own version of longevity noodles. My family is from Sichuan so we love us some spice! I’m sharing my Dan Dan Noodle recipe that uses homemade chili oil that brings some heat to our longevity noodles.” – Wendy Zeng
Infused Dan Dan Noodles Recipe
https://vimeo.com/510835887
Ingredients
4 tbsp vegetable oil
¼ lb ground pork (sub for shiitake mushrooms if veg)
2 tbsp yacai (preserved mustard)
1 tbsp ginger
1 tsp sweet bean paste
2 1/2 tbsp soy sauce
1 tsp dark vinegar
1 tbsp sugar
1-4 tbsp infused chili sauce, depending on your preferred dosage
½ tsp ground sichuan peppercorn
3 cloves garlic
2 tbsp sesame paste
1/2 lb dried wheat-flour noodles
1 sprig scallion, finely chopped
Directions
Heat 2 tbsp oil in a small nonstick pan. Stir-fry ground pork (or mushrooms) until cooked through and all the water has evaporated. Mix in ginger and preserved mustard, stir fry for 30 seconds before adding sweet bean paste and stir-fry another 30 seconds. Remove from heat.
Mix together the remaining 2 tbsp oil and the next seven ingredients in a medium-large bowl that you plan to serve the noodles in ( soy sauce, dark vinegar, sugar, chili sauce, Sichuan peppercorn, garlic, sesame paste)
Cook the noodles to your liking (al-dente according to package). Drain, add to bowl with sauce, and top with preserved mustard sauce. Sprinkle scallions on top of sauce.
Angela Mou is the Founder of the contemporary smoke shop, Elevate Jane.
As the daughter of Taiwanese immigrants, her small business aims to destigmatize with unique aesthetics and thoughtfully-designed art pieces that smokers can proudly display on their coffee tables.
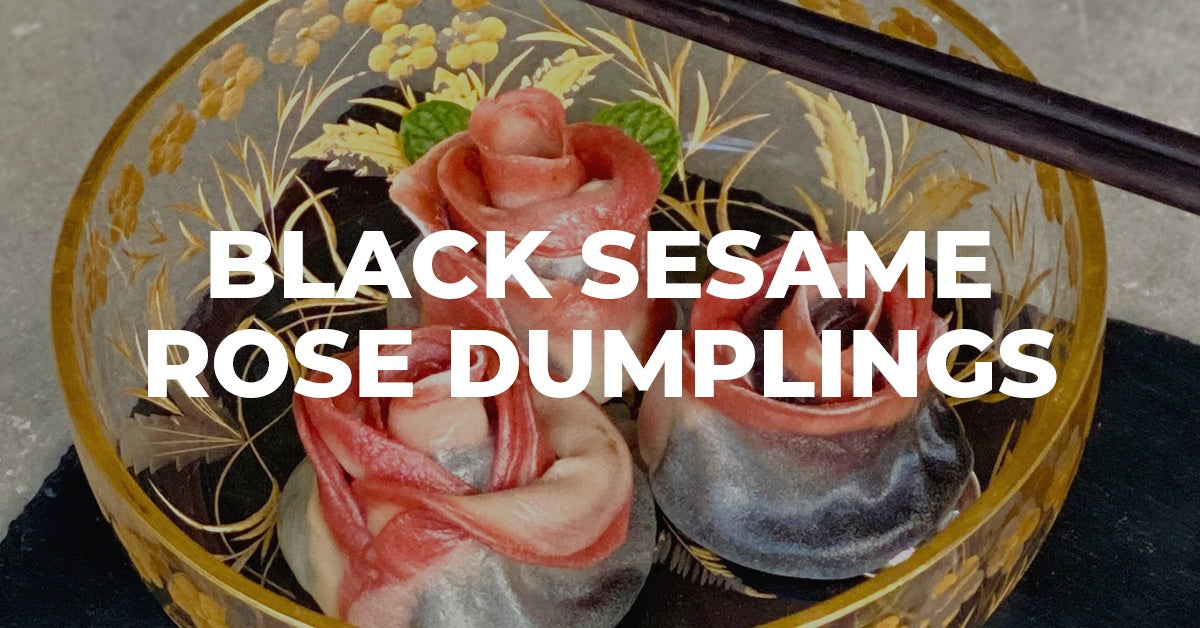
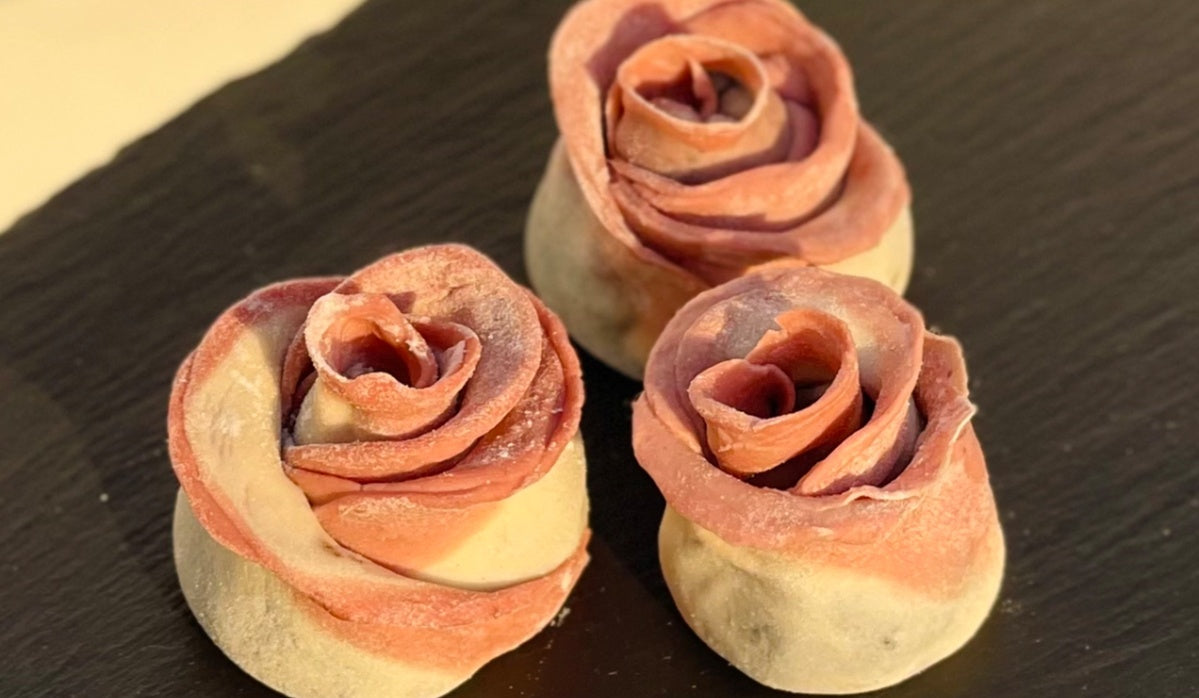
For Lunar New Year, she shares a new dessert she’s integrating into her celebrations — an infused black sesame rose dumpling!
Chef’s Note:“For as long as I can remember, my grandmother and I have *loved* eating tang yuan – round glutinous rice dumplings filled with a black sesame paste, sometimes in a lightly sweetened ginger broth. The textures are incredible – you bite into the soft dumpling exterior and then get the lightly crunchy granulated sugar and sesame filling. They’re a Lunar New Year essential (their perfectly round shape that represents a full moon), but my grandmother and I ate them year round.
I grew up in the suburbs of LA, with amazing access to ingredients + food that my parents grew up eating in Taiwan, but Lunar New Year is a different holiday when you’re in Asia. IYKYK. My strongest memories of Lunar New Year are from my years spent living in Shanghai. I’ll never forget my first Chinese New Year there… the firecrackers! Nonstop all day, all night, everywhere, for days! There, I fell in love with the dessert black sesame xiaolongbao at Din Tai Fung. Xiaolongbao is a specific type of dumpling – dumplings are a staple of Lunar New Year. They symbolize purses, and we eat them so our purses will grow fat this year!
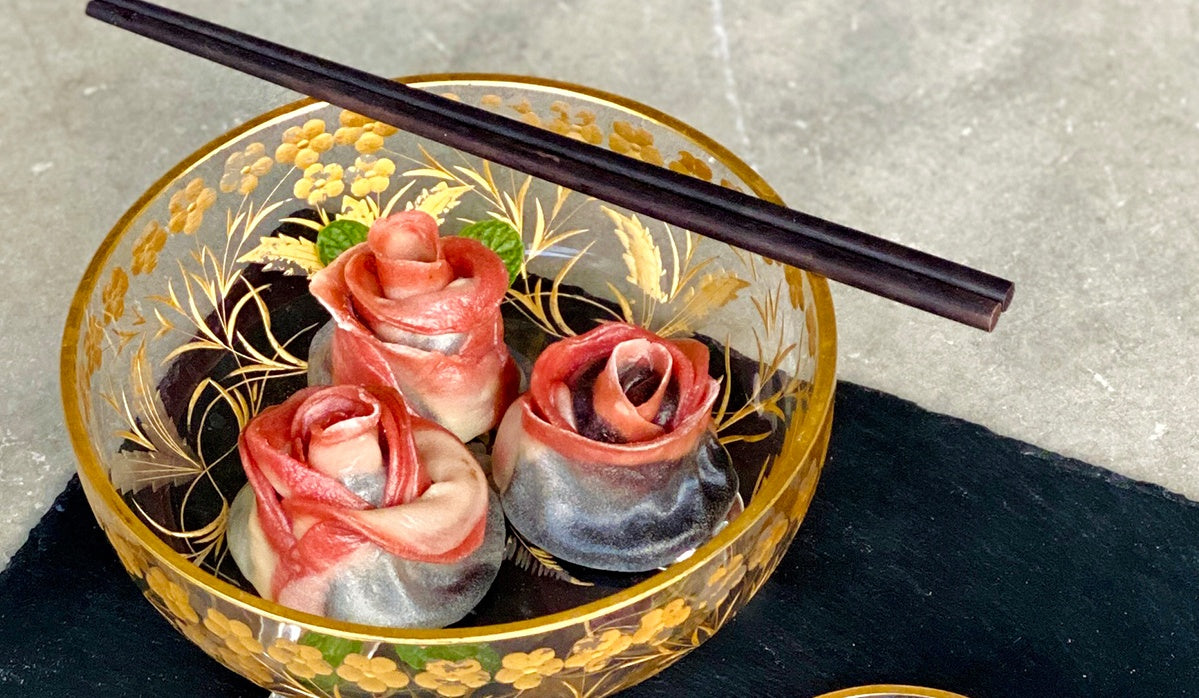
As an homage to my grandmother and our shared love for black sesame dumplings, I made naturally-dyed rose dumplings filled with black sesame. When you order dumplings at Din Tai Fung, you’ll receive a dish of black vinegar, julienned ginger, and fresh red chili rings as dipping condiments. As a playful nod, I made a fresh ginger and chili dipping syrup with coconut sugar. The coconut sugar is makes a dark syrup that mimics the color of black vinegar, but the flavor is sweet, similar to the soup that tang yuan often comes in.” – Angela Mou
Black Sesame Rose Dumplings Ingredients
https://vimeo.com/511318797
Infused Coconut Ingredients
½ cup coconut oil
1-3 grams cannabis or hemp flower
White Dumpling Dough Ingredients
2/3 cup all-purpose flour
5 tbsp water (or replace with vegetable juice for color, see notes
Pink Dumpling Dough Ingredients
2/3 cup all-purpose flour
5 tbsp beetroot juice
Black Sesame Filling Ingredients
½ cup black sesame paste
¼ cup coconut sugar
⅛ tsp salt
3 tbsp infused coconut oil
Chili-Ginger Dipping Syrup Ingredients
¼ cup water
½ cup coconut sugar
5-10 thin slices fresh ginger (to taste)
1-4 fresh chilis, split lengthwise (to taste)
Cannabis-Infused Black Sesame Rose Dumplings Recipe
This recipe makes 6-8 dumplings.
Directions For Infused Coconut Oil
Decarb cannabis or hemp flower and infuse into oil using the Nova or FX.
Directions For Chili-Ginger Dipping Syrup
Combine the coconut sugar and water in a small saucepan. Bring to a boil over high heat, stirring occasionally to dissolve the sugar. Add the ginger and chiles, reduce the heat to medium, and boil for 2 minutes longer. Remove from the heat. Pour into glass jar and allow to cool. Seal and refrigerate until ready to use
Directions For White Dumpling Dough
Put the flour in a small bowl, slowly pour in the water and knead until mixture forms a soft dough. If the dough seems too dry, add 1 tsp water at a time. Knead for 2 minutes and wrap the ball in plastic wrap.
Directions For Pink Dumpling Dough
Repeat as above, using beetroot juice instead of water. Let both doughs rest for 25-30 minutes. In the meantime, prepare the filling.
Directions For Black Sesame Paste Filling
Thoroughly mix together black sesame paste, coconut sugar, salt, and infused coconut oil. Place into small bowl and freeze for 20 minutes so it’s more scoopable.
Directions For Combining Doughs
After the dough is easier to cut, slice into thin slices and thinly roll out dough slices to seal pink dough ring around the white dough center circle.
Lay 4 dumpling wrappers on a cutting board, overlapping by about ½ inch. Remove sesame filling from freezer and scoop half moons of filling in the center of each circle. Dab top half of each dough circle with water and fold all 4 dumplings in half, resulting in 4 half-circles that are slightly overlapping. Start from one corner and roll the dough firmly into a short, fat roll. Place the rose (pink dough facing up) into steamer basket, and lightly pull each ‘petal’ apart. Steam for 10 minutes or until dough is completely cooked through. Serve with optional chili-ginger syrup on the side.
Roll white dough into a log about 6 inches long. Roll pink dough out into a rectangle to wrap the white dough completely – about 6 x 6 inches. Place white dough log onto pink dough log and roll together (like a cylindrical joint!).
Cut into ¼ inch thick slices and thinly roll out dough slices to seal pink dough ring around the white dough center circle.
Lay 4 dumpling wrappers on cutting board, overlapping by about 1/4 inch. Remove sesame filling from freezer and scoop half moons of filling in the center of each circle. Do not overfill. Dab top half of each dough circle with water and fold all 4 dumplings in half, resulting in 4 half-circles that are slightly overlapping. Start from one corner and roll the dough firmly into a short, fat roll. Place the roseinto steamer basket, and lightly pull each ‘petal’ apart.
Steam for 5 minutes or until dough is completely cooked through. Serve with optional chili-ginger syrup on the side.
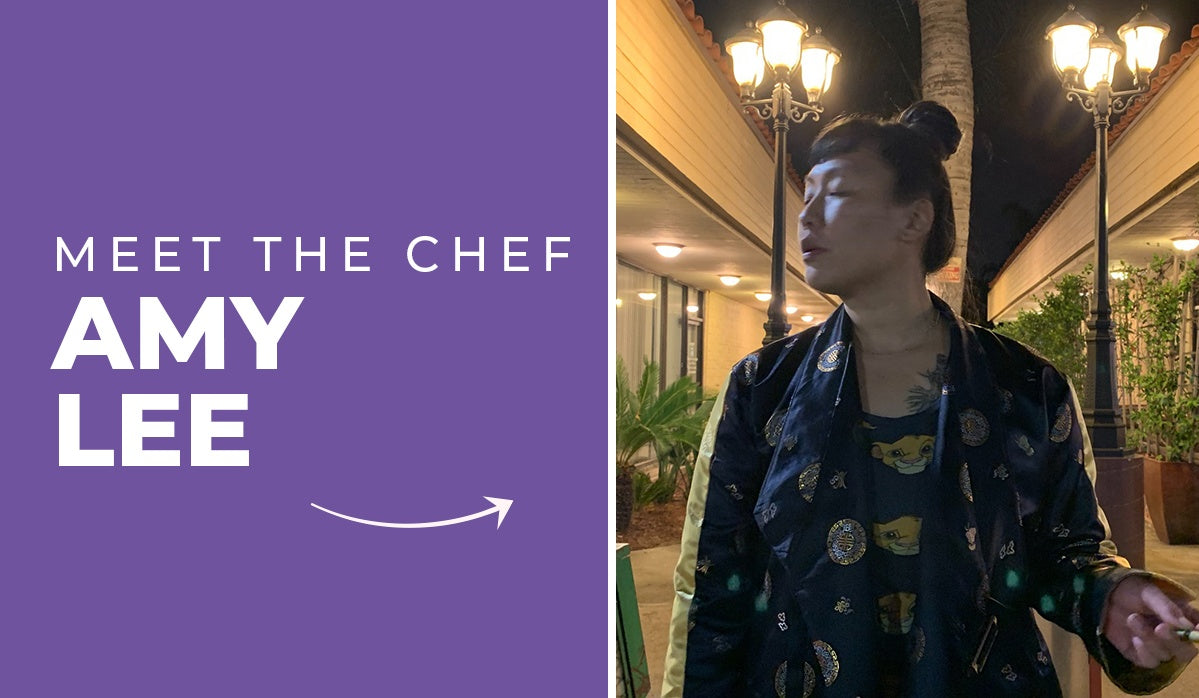
Amy Lee, also known as, Musa Mama, is a woman of many talents.
She is a birth warrior and postpartum nurturer, as well as an advocate for reclaiming motherhood with cannabis. Even with managing 5 cubs of her own, she’s supporting new mothers with specialty prenatal and postpartum menus curated entirely in-house.
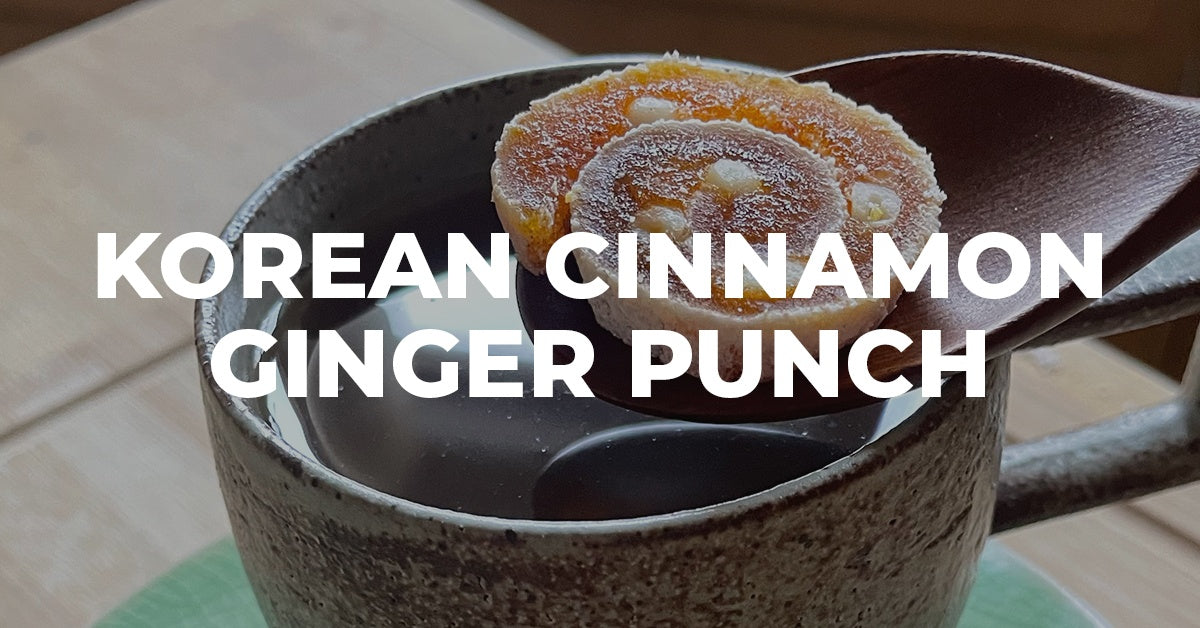
For Lunar New Year, Amy shares the traditional soojung-gwa, a Korean cinnamon ginger punch that she activated with her Ardent.
Chef’s Note: “Served after meals during the holidays, soojung-gwa is a tasty and refreshing Korean dessert punch made with ginger and cinnamon. In Traditional Eastern Medicine, both ginger and cinnamon are supportive of the yang energy and are generators of heat. More and more research is showing the correlation between good gut health and how it affects the immune system.
During these covid times, it is especially important to keep our immune system strong – so make this simple yet immensely immune fortifying punch as often as you can and share it with family and friends!” – Amy Lee
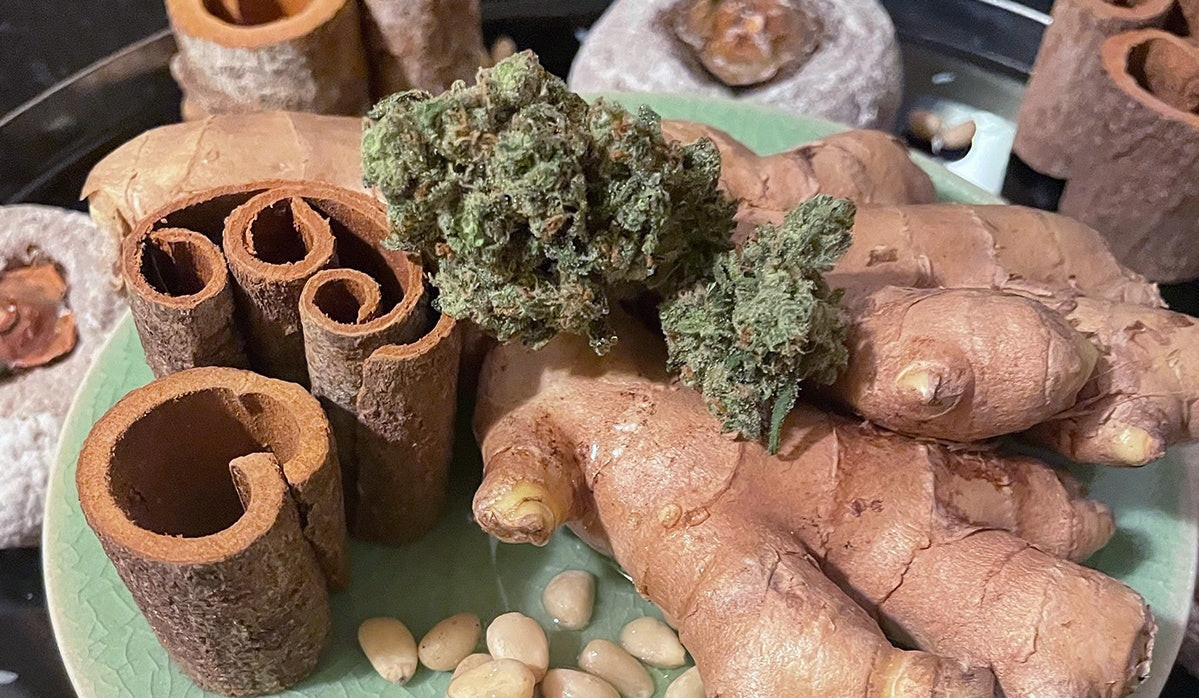
Infused Cinnamon Ginger Punch Ingredients
Ingredients
.25g or .5g of concentrate
4oz of raw honey
5oz sliced fresh ginger
5oz sorted and cleaned cinnamon bark (Sri Lankan and Vietnamese are great)
4 liters of water
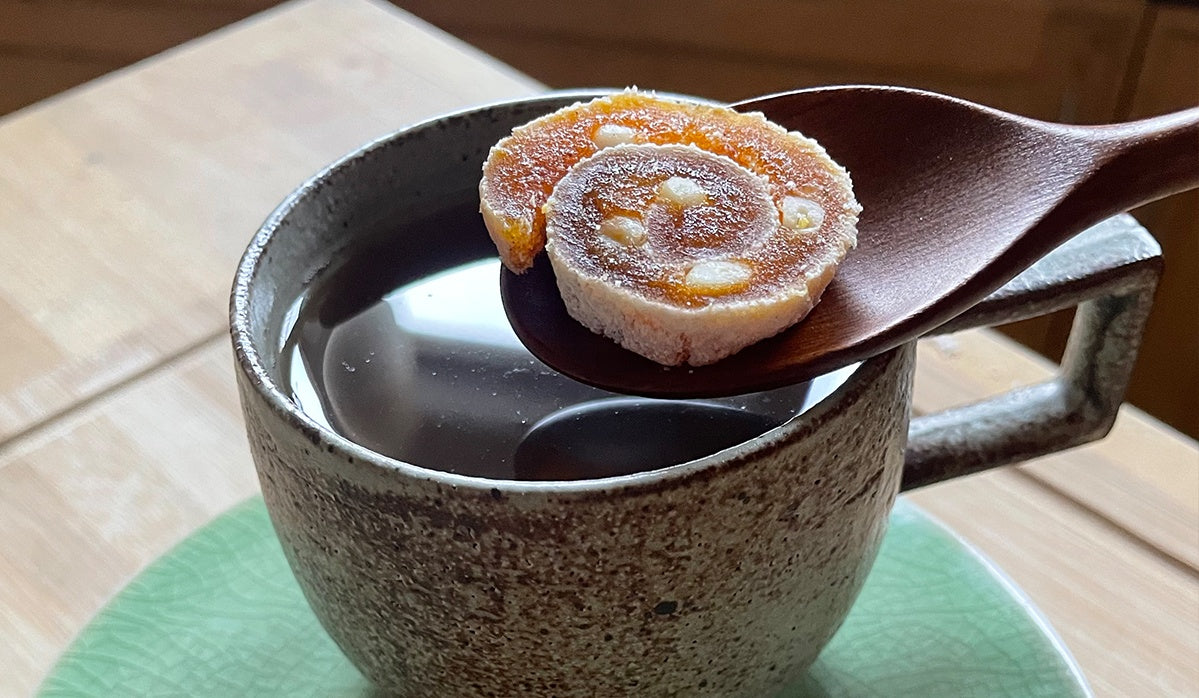
4 dried persimmons
1 oz. of pine nuts, tips taken off.
Cinnamon Ginger Punch Prep & Directions
Honey Prep Directions
Run a bit of concentrate through the proper decarb setting (A1 for THC/CBG, A2 for CBD)
Place decarbed wax in a 4oz glass mason jar. fill with honey, and put through the infusion cycle.
Put a lid and set it aside until the tea is done boiling.
Chef’s Note: This process and “wash” removes the glycol protein from the shrimp and will help the shrimp retain that bounce and texture
Tea Directions
Wash, peel and slice the ginger then soak in water for at least 30 minutes to help pull the starch out.
Inspect the cinnamon bark for any debris and wash well using a dedicated vegetable scrubber.
In a large pot, combine the soaked ginger and washed cinnamon bark and add 4L of water.
On high heat, bring to a rolling boil then turn the heat down to medium for another 50 minutes.
While the punch is boiling, make the Persimmon & Pine Nut Blunt Medallions
Persimmon & Pine Nut Blunt Medallions Directions
Remove tiny bottom tips off of the pine nuts- its bitterness will be like that little stem poking out the papes
Take the hard dried top part out- it is possible to do it by hand but kitchen shears or a paring knife is best.
Cut the dried persimmon lengthwise and carefully unroll the persimmon (as you would prep bell peppers)
Place a small row of pine nuts along the cut edge and tightly roll to the other edge.
Repeat process for 3 remaining persimmons and place into the freezer for 15 minutes to let it harden.
Take out and cut like kimbap- quarter inch medallions and set aside in a lidded container in the refrigerator.
Turn the stove off, stir in the Ardent activated honey, and let it cool down. Pour punch into mason jars or a large glass pitcher and place in the refrigerator until ready to drink.
To enjoy, pour yourself a nice cup and add a few+ of the P&P blunt medallions and enjoy!
Our talented and amazing Ardent community came through again with some creative and irresistible recipes just in time for Valentine’s Day, though they can be enjoyed all year around!
If you have a sweet tooth and are looking for some new infused candies and desserts, you’ve come to the right spot.
Check out what our Ardent Owners have created with their Ardent FX or Nova devices!
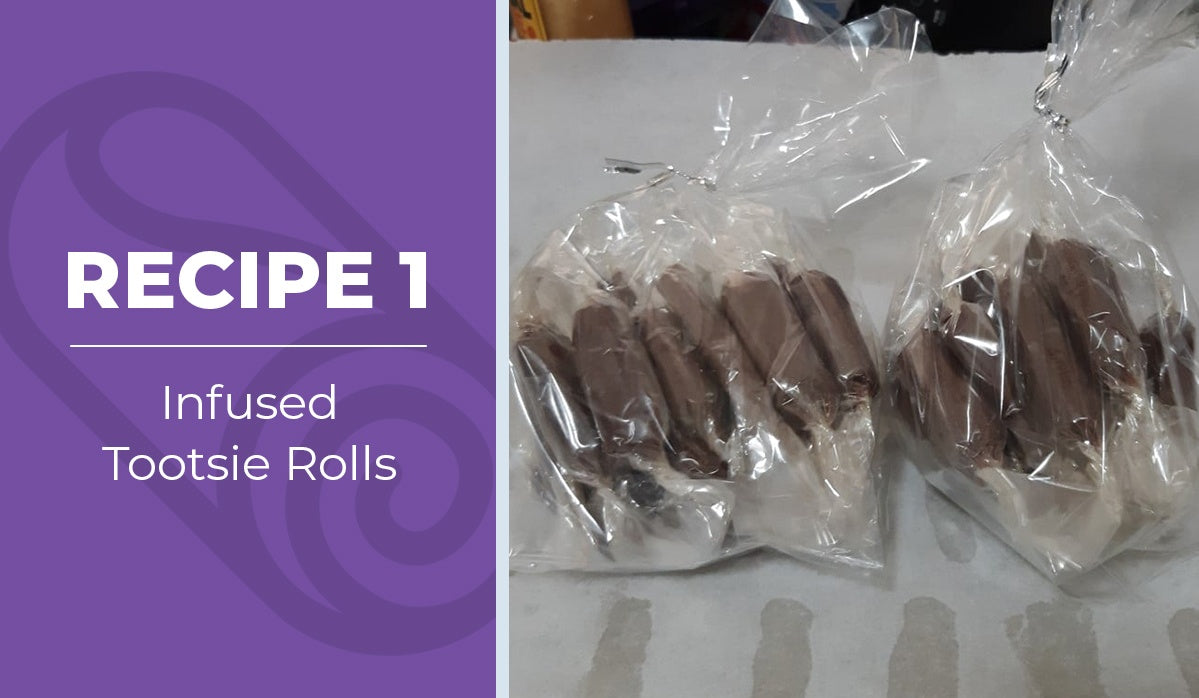
1. Cannabis-Infused Tootsie Rolls Recipe
Thanks to Denyse Ingram for the recipe!
Infused Tootsie Rolls Ingredients
1/4 cup baking cocoa powder
1 cup powdered sugar
1/4 cup dry milk powder
Pinch of kosher salt
1/4 cup light corn syrup
2 tablespoons unsalted infused butter melted
1 teaspoon pure vanilla extract
Infused Tootsie Rolls Directions
In a large bowl, sift together the cocoa powder, powdered sugar, dry milk, and salt.
Add the corn syrup, melted butter, and vanilla extract to a small bowl.
Using a fork, whisk vigorously until everything is completely combined.
Stir the syrup mixture into the dry mixture. It will at first appear like there isn’t enough liquid to bring the tootsie roll dough together, but keep going.
Using your hands, knead the mixture together for a few minutes. Eventually it will go from powdery to chocolatey, and smooth. Form the dough into a round disc.
Using a sharp knife, cut the dough into 1/2-inch slices.
Take one slice and roll it into a long, thin rope; cut the rope into 1-inch tootsie rolls.
Transfer the cut tootsie rolls to a baking sheet or cooling rack.
Repeat the process until you’ve formed about 30 tootsie rolls.
Place the tootsie rolls in the fridge for 1 hour and until firm.
Wrap the tootsie rolls in parchment or wax paper that are 3 1/2-inch x 2 1/2-inch squares.
Enjoy!
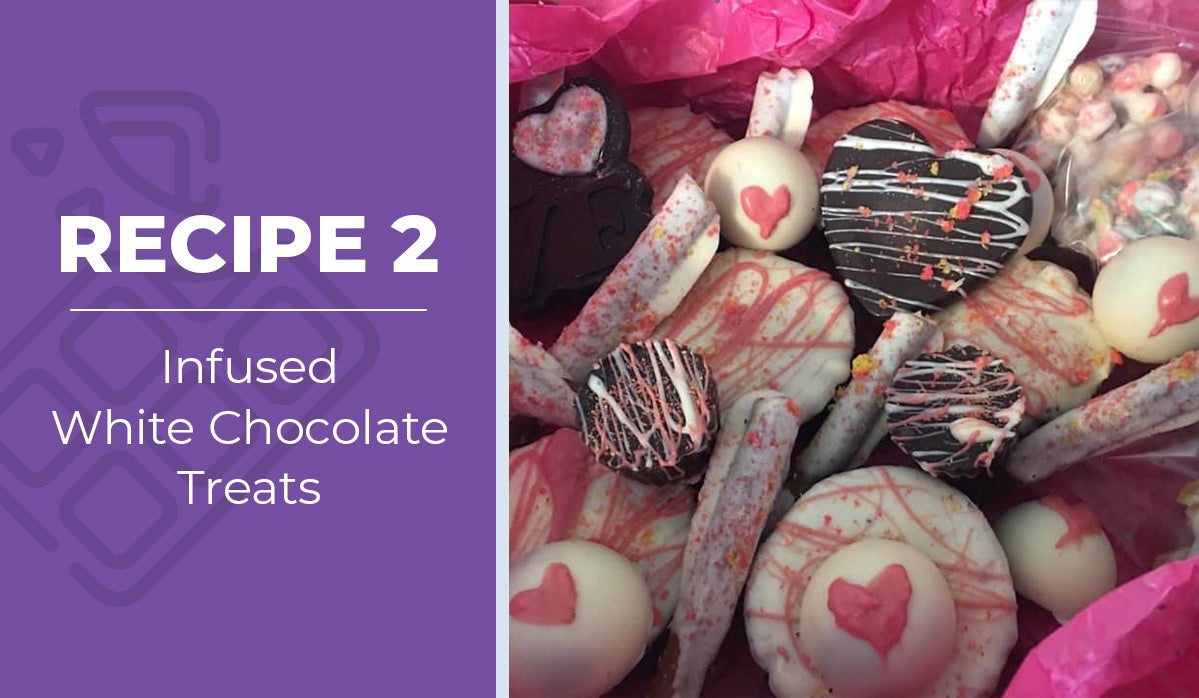
2. Cannabis-Infused White Chocolate Treats
Thanks to Lori Puzyn for the recipes!
Ingredients & Directions For Infused White Chocolate
Approximately 1 pound of white chocolate melts (Lori uses either Ghirardelli or Merkens.)
And 1/4 cup infused cannabis oil made in the Ardent FX. (Lori used 1 oz. headband to 2 cups coconut oil.)
Fill silicone molds and harden in fridge
Ingredients & Directions For Marshmallow Hearts
“This recipe came out a bit soft I had to freeze and dip.” – Lori
1 bag marshmallows
1/4 cup Infused coconut oil
2 tsp strawberry jelly
Melt in saucepan, pour into shapes molds, and freeze. Then dip into chocolate coating.
Ingredients & Directions For Cherry Brownie Cordials
Soak a dozen or so fresh (pitted) or jarred cherries in mixture for a few hours or overnight.
Put mixture into chocolate shells.
Add brownie bits
Decorate with infused white chocolate
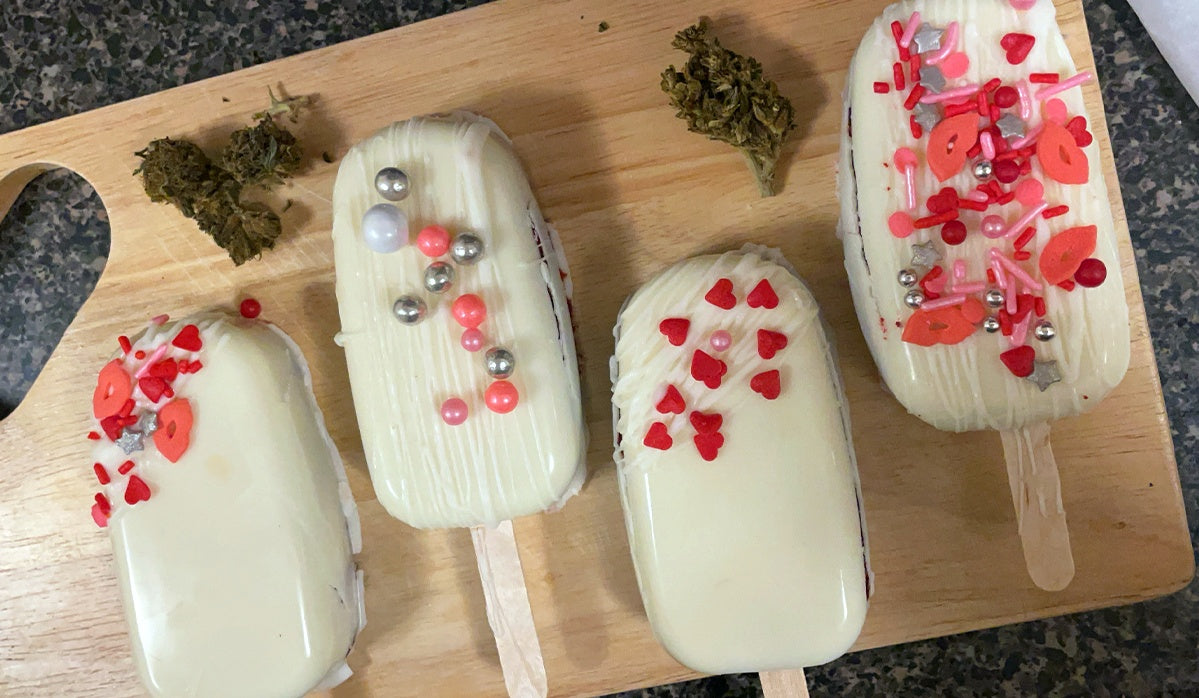
3. Cannabis-Infused Valentine’s Day Cakesicles
https://vimeo.com/510467100
Thanks to our very own Sarah ElSayed for the recipe!
If you want to step out of the box this Valentine’s Day with a delicious, infused experience, these Valentine’s Day cakesicles will take you there. Whether you’re making these upgraded cake pops with your Valentine or by yourself, you’ll be sure to feel the love like a nice, warm hug, as soon as the edible hits.
Click hereto view the full recipe, ingredients, and step-by-step directions!
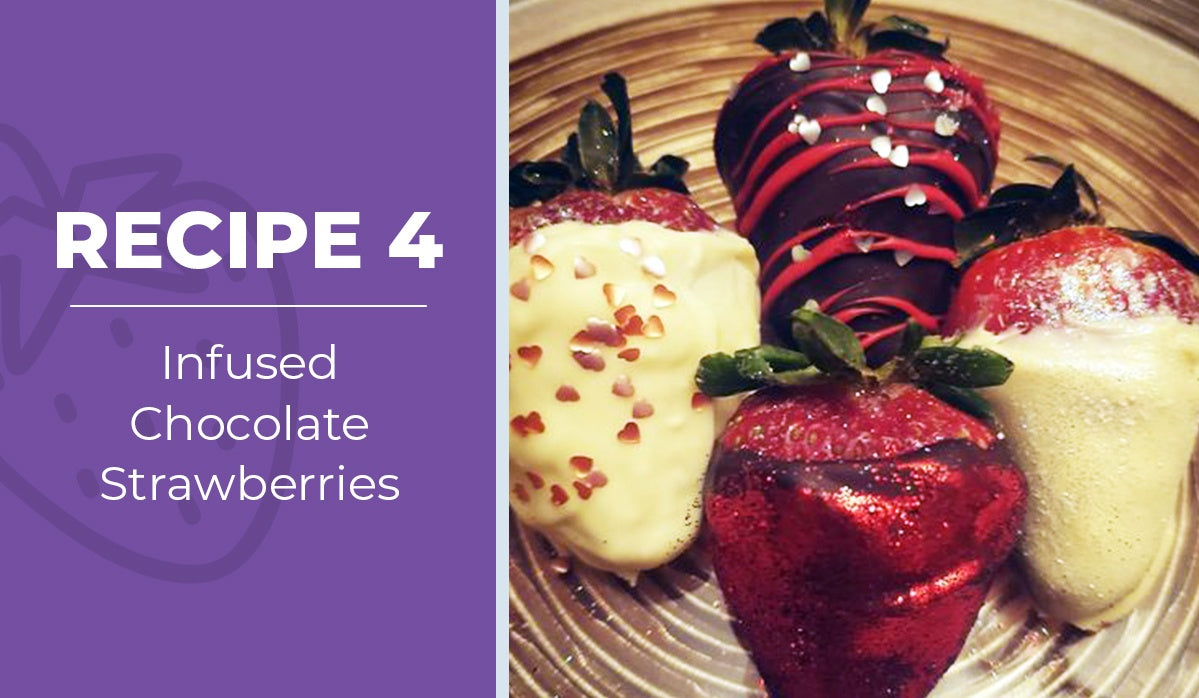
“For my small batch, custom strength (made possible with Ardent FX) organic strawberries and Belgian chocolate – I work with wax, both THC and CBD so I am able to make strong infusions in a small amount of MCT oil. 700mg in a 1tsp of oil.
If I want 25mg strength then I will be using about 28 strawberries. I did some non-dosed experiments and found each strawberry used about 1 tbsp chocolate.
That is 14 oz. of chocolate that I temper and then add that 1 tsp of oil. Blend well. I use real chocolate, not chips, wafers etc. My white chocolate is Callabout, I never have an issue melting.” – Lisa
Which of these community recipes do you want to try first? Tag us on Instagram to show off your creations for the chance to be featured on our page. Special thanks again to our amazing community for these recipes. We love you all!
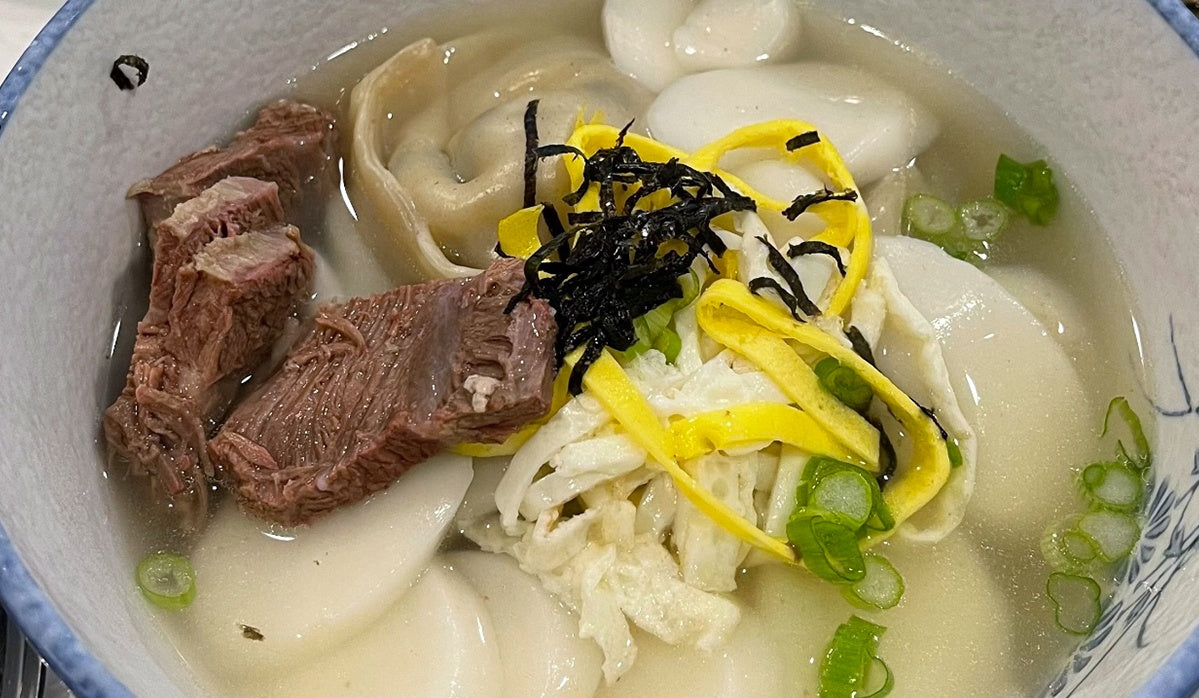
Eunice Kim, is the Founder of HiVi, a stigma-free, inclusive space devoted to a life well lived that amplifies womxn, BIPOC, and LGBTQIA+ folks. For Lunar New Year, Eunice shares her family’s recipe for dduk guk (떡국) also known as rice cake soup.
Learn how to make Eunice’s delicious family dduk guk recipe below!
“Korean rice cake soup is a humble but soul-nourishing dish that I look forward to eating every Lunar New Year morning for Lunar New Year. I don’t think I’ve ever skipped a year.
The savory beef broth, which is lovingly slow-cooked, is a nice hearty base for soft and slightly chewy rice cakes. The colorful garnishes that top the dish signify abundance, new beginnings, and love. It’s warm and nurturing, and a beautiful way to start the new year.
There are so many recipes for this dish, such as anchovies or veggies for the broth. This recipe is inspired by my mom’s and she loves using beef because it feels special and hearty for the new year.” – Eunice Kim
떡국 – Dduk Guk – Rice Cake Soup Recipe
Beef Broth Ingredients
12 cups water
½ pound beef brisket
1 medium onion peeled and halved
8 cloves of garlic peeled
3 scallions white and pale green parts (dark green parts reserved for garnish below)
2-3 tablespoons Korean soup soy sauce or to taste
Salt and pepper to taste
떡 – Dduk – Rice Cake Ingredients
4 cups sliced 떡 – dduk – rice cakes (or 1 cup per person), soaked in a bowl of cold water for 20 minutes
Garnish Ingredients
Cooked beef brisket removed from the broth and thinly shredded
Crumbled or thinly sliced 김 – gim – dried and roasted seaweed
Salt and pepper to taste
Cannabis-Infused Rice Cake Soup Directions
Directions
Place the cold water, beef, onion, scallion ends, and garlic in a large pot, cover and bring to a boil. Skim off the foam that forms at the top with a ladle and discard.
Reduce the heat to a simmer. Simmer, covered, until the meat is tender enough to shred easily, about 1 ½ – 2 hours.
While you wait, work on your garnishes. To make the egg garnish, separate the yolks from the whites. Whisk the yolks. Heat a lightly oiled small nonstick pan over medium-low heat. Pour the yolks into a thin layer, by spreading it with a spoon. Cook each side, but do not brown the egg. Slice your omelets into thin strips. Lightly beat the whites and set aside.
Remove the cooked meat from the broth and cool slightly. Shred the beef into thin strips and combine well with the minced garlic, sesame oil, or cannabis-infused sesame oil, salt, and pepper to taste. Slice the scallion on the bias into thin strips. Have your sliced or crumbled 김 (Gim) on hand. Set everything aside.
Back to the broth, Remove the vegetables from the broth and discard. Return the broth to a boil. Stir in soup, soy sauce, salt, and pepper to taste.
Drain the soaked rice cake slices and boil in the broth until soft, but not mushy, usually about 2-4 minutes, or until they rise to the top.
Slowly stream in the egg white to form ribbons in the soup. Turn off the heat once the egg is cooked.
Ladle the hot soup into individual bowls and garnish with some of the seasoned shredded beef, egg yolk strips, sliced scallions, and 김 – gim – roasted seaweed strips.
Chef’s Note:
You can make variations of this soup just by adding dumplings, and then it will become 떡만두국 – Dduk Mandu Guk – Rice Cake Dumpling Soup.
Serve with kimchi and other traditional Korean 반찬 -ban chan – small side dishes
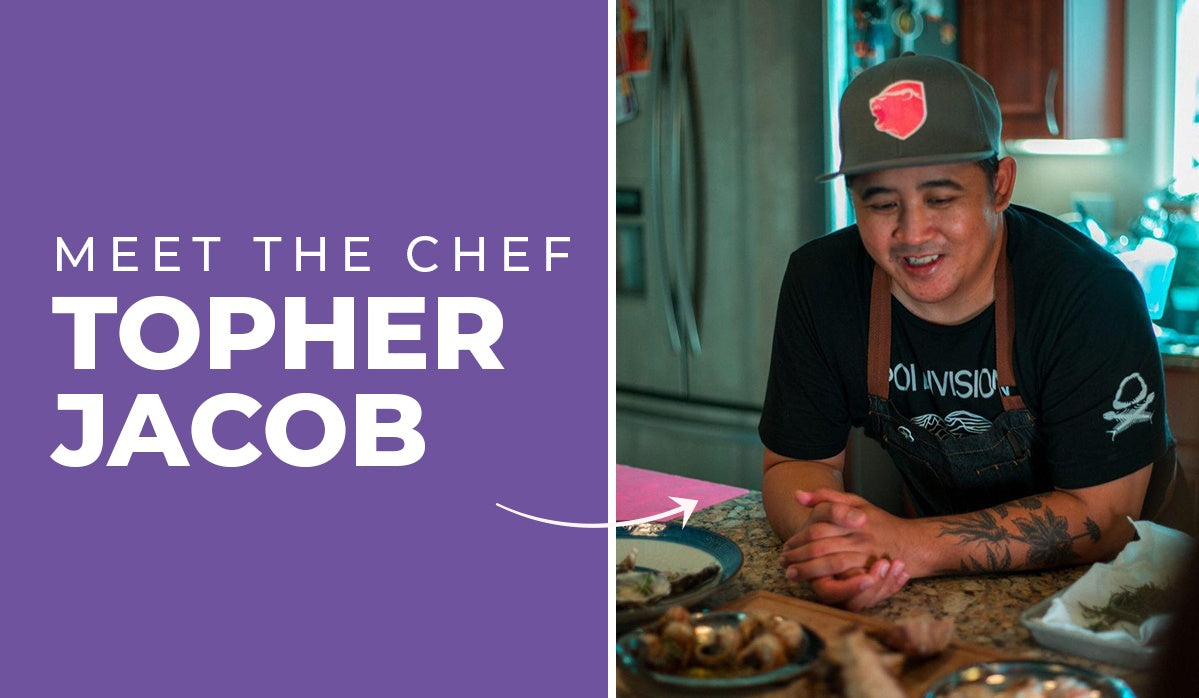
Topher Jacob, aka the Hawaiian Alchemist, is a culinary cannabis chef based in Honolulu, Hawaii. He believes the plant is for “more than just smoke” and creates refined, infused dishes and desserts utilizing every part of the plant.
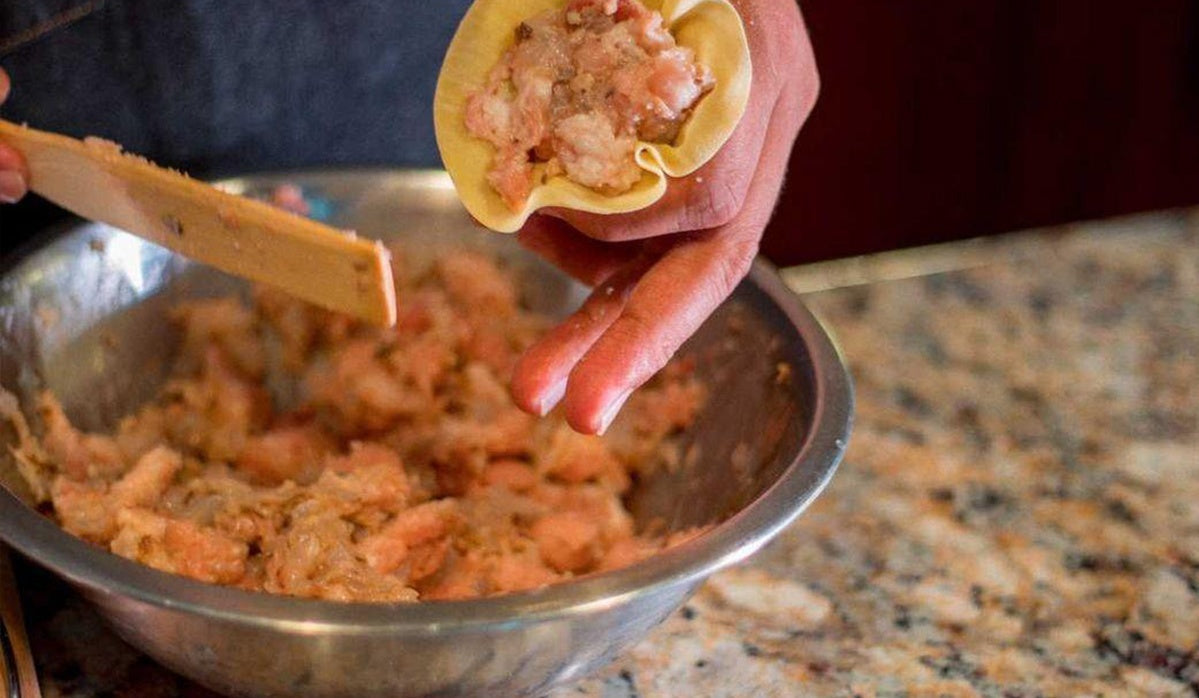
For Lunar New Year, Topher shares his family’s ancestral history and an infused pork and shrimp siu mai.
Chef’s Note: “My Cantonese heritage stems from my father’s, father, which already made it challenging to understand anything about our families history as it was the one side we weren’t particularly close with, and he passed away when I was much younger. Before the passing of my grandmother, and with the help of the Chinatown preservation society, I pieced together my background. Starting from the US military occupation during WW2, from my grandma’s sewing circles in the underground gambling houses that would smuggle in illegal ingredients to the Chinese apothecaries directly from the docks, to the barber shop my grandfather once owned that had a secret passageway connecting it from one end of the block to the main square, that is now known today as “Maunakea Marketplace.”
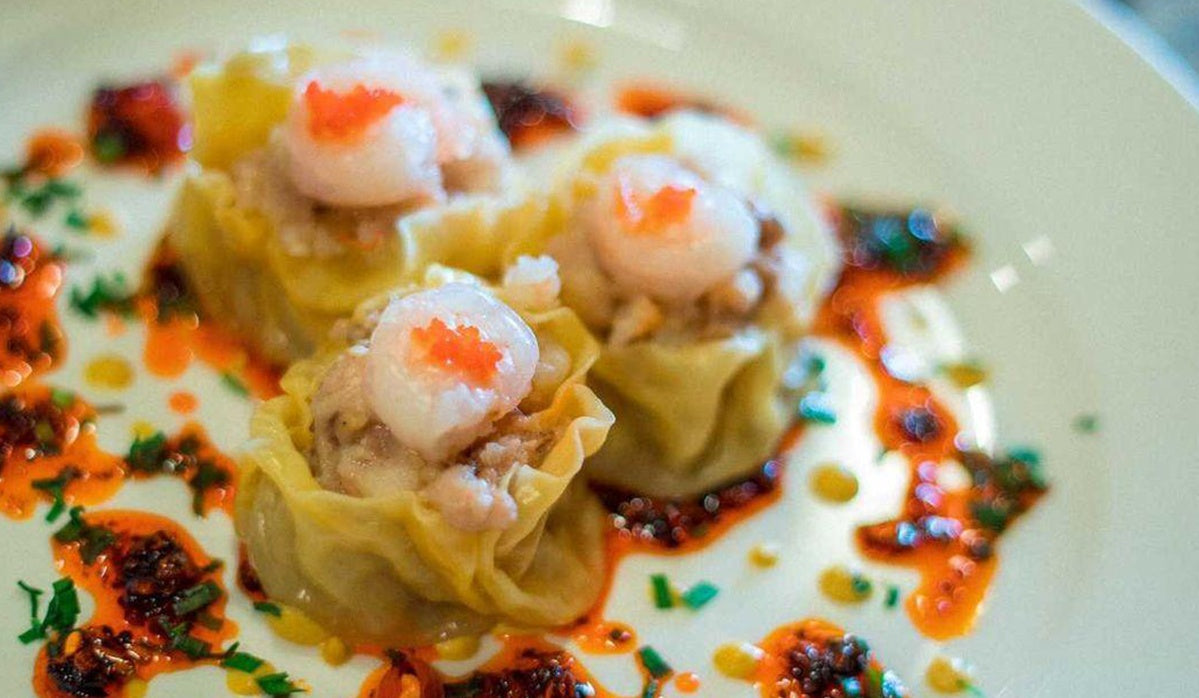
Siu mai is a Cantonese dish that is one of the most popular items at yum-cha / dim sum. They translate to “cook-sell” as these dumplings are said to get their name from being so delicious they are sold as soon as you cook them. My family celebrated Lunar New Year much more than the traditional new year, although in Hawaii, both celebrations are taken quite seriously to bring in the new year of every culture. But what always remained was our gathering of families at yum cha or dim sum. Yes, yum cha/dim sum was nearly a weekend excuse to gather and converse about our week with other family members but it was during the Lunar New Year that our dim sum parties seemed much bigger, and I always felt a stronger bond to family during those times.
These are rather labor intensive to make, and the recipe is rather long. But we are combining some old-world techniques to maintain some traditions and marrying it with new ones.
Your work will be well rewarded with the satisfaction of knowing you can accomplish making this popular dim sum dish at home. They also freeze really well, so make a big batch, gather the family and have a Siu mai wrapping party!” – Topher Jacob
Infused Siu Mai Dumplings Recipe
Infused Oil Ingredients
3.5g cannabis (you can adjust the amount to your preferred potency)
Add your oil into the Ardent FX or Nova and start the infuse cycle.
If you are using an FX, place your infusion press into the FX, and slowly push the plunger down. Pour into a jar/container with an airtight lid and cool. If you are using a Nova, simply pour your oil through a strainer or cheesecloth and place into your container. Store in the fridge for 2 weeks or freezer for 3 months
Siu Mai Ingredients
400g skinless pork belly
200g raw peeled shrimp, (Deveined & deshelled) meat, roughly chopped. This recipe used 51/60 shrimp
(Optional) 1 shrimp for topping each shumai made
25-35 Round wonton wrappers (yellow egg pastry)
Chef’s Note: If you can’t find round wonton wrappers, you can use a large glass or round pastry cutter that fits just inside of the square wrapper and use a butter knife to cut out the circles.
Shrimp Marinade/Wash Ingredients
½ tsp salt
¼ tsp baking soda
Seasoning Ingredients
4 dried shiitake mushrooms, rehydrated, soaked in hot water and finely diced
2 tbsp reserved shiitake mushroom liquid
1 tbsp minced ginger
1/4 tsp baking soda
3/4 tsp water
2 tsp salt
1 1/2 tbsp sugar
1/2 tbsp chicken bouillon
1/2 tbsp white pepper powder
1/2 tsp MSG
2 tsp soy sauce
2 ½ tbsp Infused Canola Oil
(Optional) flying fish roe, crab roe or finely diced carrot
Chef’s Note: If you dislike or don’t have access to MSG, just swap it with an even amount of chicken bouillon powder.
Cannabis-Infused Siu Mai Dumplings Prep & Directions
Shrimp Prep Directions
In a bowl combine the shrimp with the shrimp marinade/wash, mix to coat all of the shrimp, and let sit for 5 minutes
Wash shrimp under cold water, till they no longer feel tacky, and you’ll feel the textual difference between them when they were marinating to when they are fully washed.
Rough chop to get them into a similar size as your diced pork and dry them thoroughly with a towel. Set aside.
Chef’s Note: This process and “wash” removes the glycol protein from the shrimp and will help the shrimp retain that bounce and texture
Pork Prep Directions
Slice the pork belly in 1cm wide slices, then cut across the slices into 1cm pieces. Roughly chop the pork with a cleaver. There should still be large pieces of pork visible, rather than a mince.
Soak the diced lean in cool water for about a minute. Once the water’s got a bit of color to it, swap the water and soak again. Repeat this process about five times, or until the pork lean turns a ‘white-ish’ color and the water runs clear.
Filling Directions
Add the pork, along with the baking soda, water, salt, sugar, ginger, MSG, white pepper, soy sauce, and chicken bouillon to the bowl of a stand mixer with the beater attachment, for about 10-15 minutes on med-high
Add the shrimp and mushroom and mix through the pork at low speed.
Add your shiitake water and mix on low
Add your infused oil and mix on low till combined
Transfer meat mixture into another bowl, cover with plastic wrap and refrigerate for 30 mins to an hour
Take a wonton wrapper and with a butter knife or small spatula, place a small amount of filling in the center of a wrapper. Gather the pastry around the filling and continue adding more filling with the knife or spatula, pushing the filling down tightly to ensure there are no air bubbles.
Once the wrapper is gathered into a filled cylinder shape, tap the base against your board to flatten it, and place it onto a baking tray lined with baking paper.
Top each dumpling with a shrimp and little roe or a small piece of carrot.
Rest the dumplings in the fridge for at least 30 minutes before cooking. Repeat until all the filling is used up.
Set a steamer over boiling water and steam the siu mai for 8-12 minutes.
Serve with hot mustard, or if you want an extra boost, serve with some of Wendy Zeng’s infused chili oil for the perfect condiment pairing for these Siu Mai Dumplings.
Stephanie Hua is the founder and chief confectioner of Mellows, award-winning, gourmet, cannabis-infused marshmallows, handcrafted in San Francisco. In addition to making tasty edibles, Stephanie has been a food writer and recipe developer for more than twelve years. She is also the author of the best-selling cookbook, EDIBLES: Small Bites for the Modern Cannabis Kitchen.
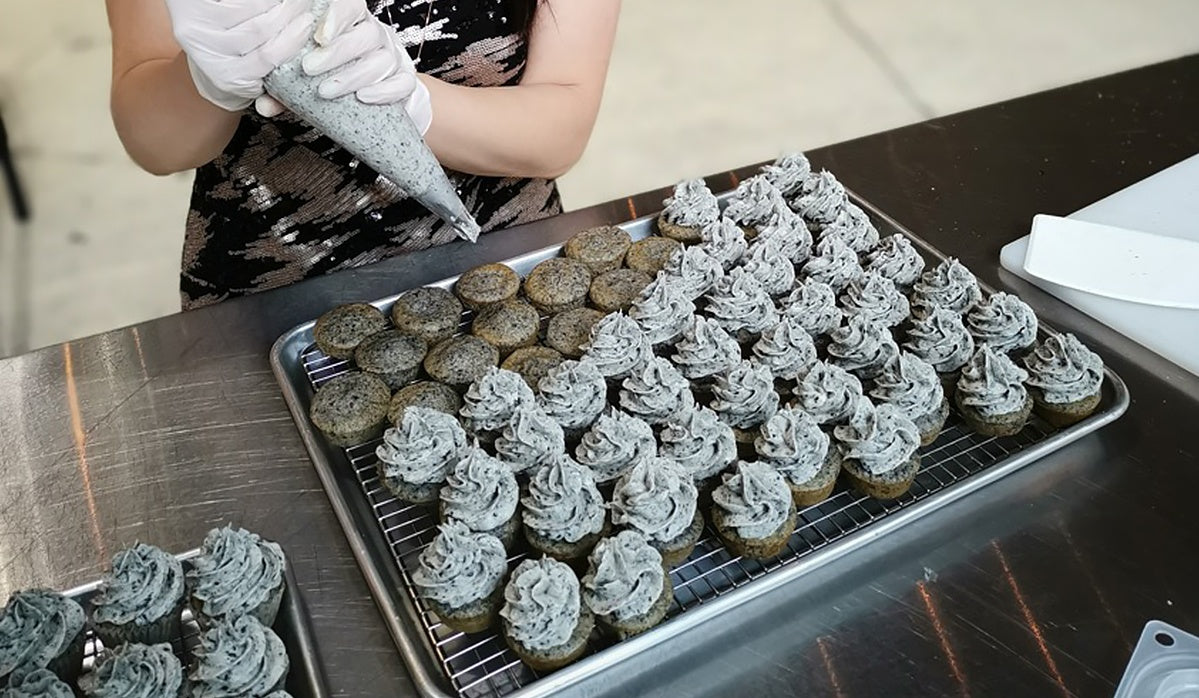
For Lunar New Year, Stephanie adapted her black sesame and raspberry cupcakes from her cookbook, where she pays homage to the traditional tang yuan.
Stephanie says, “I love the surprise factor of these striking cupcakes. At first glance, most people expect them to be chocolate, but one taste and their eyes widen and murmurs of “Oooooh sesame!” escape their lips. The second surprise comes when you bite into the cupcake and discover a hidden raspberry treasure tucked inside!
This may not be a traditional Lunar New Year treat, but the sweet black sesame flavor pays homage to tang yuan, mochi-like balls made of sweet glutinous rice flour and stuffed with fillings like black sesame, red bean, and peanut paste. Growing up, we always had black sesame ones, served in a bowl of syrupy ginger soup.
This Chinese dessert is traditionally eaten during the Lantern Festival (yuan xiao), the last day of the 15-day Lunar New Year celebration. Yuan xiao translates to “first evening,” as this is the first full moon after the new year.
The round, smooth shape of the tang yuan represents the new moon, a symbol of harmony in Chinese culture. The pronunciation of tang yuan also sounds like the Chinese phrase for “togetherness,” fitting for this celebration as this is a rare time when people are able to make the journey home to reunite with their families. By eating this dessert together, it brings good luck to families and wishes for more happy reunions in the coming year.
This year in particular, when so many of us can’t be with our families, I can’t think of a better intention to put into the universe. We’ll be celebrating the first full moon with our own special twist on black sesame treats, and wishing you and yours harmony, abundance, and joyful reunions in the new year! Gong hay fat choy!” – Stephanie Hua
Black Sesame & Raspberry Cupcakes Ingredients
Time Needed: 1 hr (plus infusion time)
Makes: 24 mini cupcakes
Dosage: 5 mg THC/cupcake
Cannabutter Infusion Ingredients
.6 g cannabis flower at 20% potency
2 ½ Tbsp | 35 g unsalted butter
Black Sesame Cupcakes Ingredients
1/2 cup + 2 Tbsp | 88 g black sesame seeds
1/2 cup | 70 g cake flour (See Note)
1/2 tsp baking powder
Pinch of baking soda
Pinch of kosher salt
2 ½ Tbsp | 35 g Canna Butter, room temperature (See Infusion Notes)
Cannabis-Infused Black Sesame & Raspberry Cupcake Recipe
This recipe serves 4.
Directions For Infused Butter
If you start with 20% flower, your decarbed material will yield a potency of 200 mg per gram. Our recipe calls for a total of 120 mg THC so you will only need 0.6 g of that flower. * To customize your dosage follow our guidelines on How to Measure THC Content.
Place the decarbed flower into an uncovered glass jar containing 35 g unsalted butter
Put the jar back into the Ardent FX and run it on the Infuse setting.
When the process is complete, strain the plant material from the butter.
Cool completely in the refrigerator. Bring to softened room temperature before using.
Directions For Black Sesame Cupcakes
Preheat oven to 350°F [177°C]. Coat a mini muffin pan with nonstick baking spray and set aside.
In a dry skillet, spread the sesame seeds and cook over medium heat until fragrant and toasted, about 5 minutes. Using a coffee or spice grinder, grind the seeds to the texture of sand. Work in batches so as not to overfill the grinder. Set aside 1/4 cup + 2 Tbsp [50 g] ground sesame seeds for the buttercream frosting.
In a large mixing bowl, whisk together the remaining ground sesame seeds, cake flour, baking powder, baking soda, and salt until well combined.
Using a handheld or stand mixer fitted with a paddle attachment, beat the canna butter on high speed until smooth and creamy, about 1 minute. Add the sugar and beat on high speed until the mixture is creamed together light and fluffy, about 2 minutes. Pause to scrape down the bowl with a rubber spatula. Add the egg whites and vanilla extract, and beat on medium-high speed until well combined. Beat in the sour cream. Scrape down the bowl again. With the mixer on low speed, add the dry ingredients and mix until just incorporated. With the mixer still running on low, slowly pour in the milk and mix until just combined. Do not overmix. Scrape the bowl down, making sure there are no lumps at the bottom of the bowl.
Evenly distribute the batter between the 24 cups of the prepared mini muffin pan. Each cup should get filled 2/3 of the way full, about 1 heaping Tbsp. If you have a scale that can fit the pan on top, weighing out the servings will give you the most accurate dosage (divide the total weight of the batter by 24 to determine the target weight per serving). Push a whole raspberry, with the opening facing down, into each cup so that it is submerged in the batter. The tip of the raspberry should just hit the surface.
Bake until firm, spongy, and slightly golden at the edges, or until a toothpick inserted in the center comes out clean, 11 to 13 minutes, turning the tray halfway through the baking time. Let cool completely on a wire cooling rack.
Meanwhile, make the raspberry coulis and sesame frosting.
Directions For Raspberry Coulis
Throw the raspberries into a blender and blend until very smooth, about 2 minutes, scraping down the sides of the blender as needed.
Strain the raspberry puree through a fine mesh strainer to get a smooth, seedless sauce.
Transfer to a condiment squeeze bottle or glass jar. Store in the refrigerator until ready to use, or up to 1 week.
Directions For Buttercream Frosting
In the bowl of a stand mixer, combine all the buttercream ingredients, including the ground sesame seeds you had set aside. Using the paddle attachment, stir on low until the powdered sugar is incorporated. Then increase to medium-high speed, pausing to scrape down the sides of the bowl a few times, until the buttercream is fluffy and evenly mixed, 1 to 2 minutes.
If you prefer piping the frosting out to decorate the cupcakes, transfer the frosting to a pastry bag fitted with a decorative tip (we’re fans of the Wilton 1M tip for this), or zipper-lock bag with the bottom corner cut off. Alternately, you can use an offset spatula or butter knife to spread on the frosting.
Decorate each cupcake with the sesame frosting and top with a drizzle of raspberry coulis. Enjoy immediately!
Chef’s Tip: The cupcakes can be made and kept in an airtight container at room temperature for up to 1 day.
The frosting can be made and kept in an airtight container at room temperature for up to 3 days. If leaving butter out at room temp gives you the willies, you can refrigerate it, but be sure to allow time for it to come back to room temperature before you attempt to pipe it out. You may need to paddle it in the mixer again to soften it to an easily spreadable texture.
The raspberry coulis can be made and stored in an airtight container in the refrigerator for up to 1 week. If transporting the cupcakes, reserve the raspberry coulis and drizzle right before serving.
Chef’s Note: If you don’t have cake flour you can make your own. To make 1 cup of cake flour, measure out 1 cup of all-purpose flour. Remove 2 Tbsp and replace with 2 Tbsp cornstarch. Sift together the flour and cornstarch 3 to 4 times to incorporate and aerate it.
Happy Lunar New Year! It’s 2021: the year of the Ox. If you were born in 1949, 1961, 1973, 1985, or 1997, this is your year!
While celebrations look a little different this year, we can always count on traditions to unite us all. All week we’ll be sharing recipes from our friends in the cannabis industry who honor the holiday with an Ardent-activated infusion.
Monica Lo is the brains behind the blog and infused recipe hub, Sous Weed. Many of Monica’s recipes pay homage to her Taiwanese-American background, and this Lunar New Year recipe is no exception.
“The Lunar New Year is traditionally the largest celebration of the year. It’s a time for families to get together to honor their ancestors and to eat delicious food. Throwback to 2,500 years ago to our Chinese ancestors who consumed cannabis for medicinal, spiritual, and ceremonial purposes. And we’re still doing it today! I’m going to share how I use my Ardent FX to decarb my cannabis and activate the THC. Then I’m going to use it to infuse some sesame oil using the sous vide method.” – Monica Lo
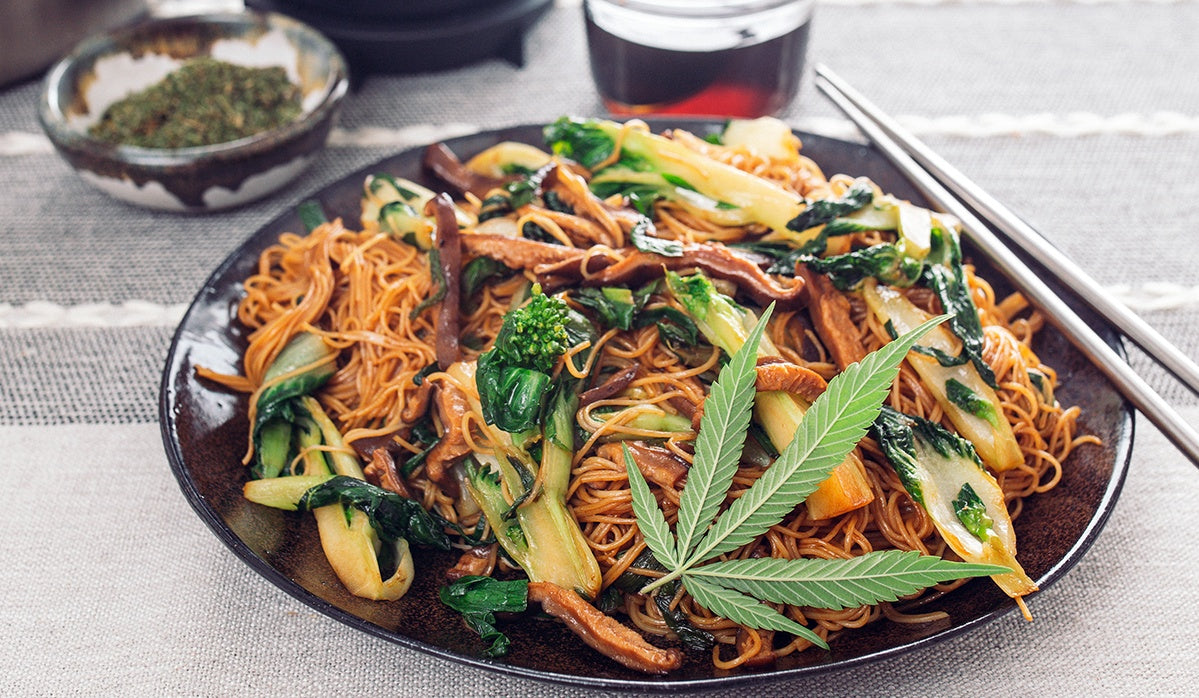
Longevity noodles are traditionally eaten on birthdays and during other celebrations and milestones symbolizing a long life ahead. They should be slurped, rather than chewed, as to not cut that long life short. Check out Monica’s method for delicious, infused longevity noodles below!
Sous Weed Sesame Oil Recipe
https://vimeo.com/510778236
This recipe makes 8 oz. of sesame oil.
Ingredients
8 oz toasted sesame oil
4 g cannabis flower (you can add more or less depending on desired potency)
Cannabis-Infused Sesame Oil Directions
Place your cannabis flower in the Ardent FX and select A1 to activate THC to decarboxylate.
Pour sesame oil into a quart-sized freezer-safe zip bag*.
Roughly crumble the decarboxylated cannabis and place into the bag of sesame oil. Push the air out and seal the bag completely.
Set your sous vide water bath to 85ºC (185ºF) and submerge the bag in the water. Sous vide for 4 hours.
Remove from water bath and strain out the solids. Discard the flower and allow the infused sesame oil to cool. Store in a cool dark place.
*You can also use a mason jar or silicone sous vide bags.
**Ardent note: you can infuse sesame oil directly in the FX by pouring the oil into the device over the decarbed herb and running the “Infuse” setting. Separate flower from usable material using the Infusion Press for mess-free straining and cleanup.
Cannabis-Infused Longevity Noodles Recipe
This recipe serves 4.
Ingredients
10 oz thin Yi Mein (dried Longevity noodles)
1 tsp toasted sesame oil
1/4 tsp sugar
1/4 tsp kosher salt
2 Tbsp water
2 tsp soy sauce
2 tsp mushroom-flavored dark soy sauce
1 Tbsp oyster sauce
1 tsp Sous Weed sesame oil
1/4 tsp white pepper, freshly ground
3 Tbsp canola oil
4 shiitake mushrooms, thinly sliced
4 small bok choy, quartered
Large handful of Chinese chives, cut into 2-inch pieces
Directions
Cook the noodles according to the directions on the package. Once it is al dente, drain the noodles and add a teaspoon of regular sesame oil. Gently toss with chopsticks to coat the noodles with oil so they don’t stick together. Set aside.
In a small mixing bowl, add sugar, salt, water, soy sauce, mushroom-flavored dark soy sauce, oyster sauce, Sous Weed sesame oil, and white pepper. Mix well and set aside.
Heat your wok over high heat with 2 Tbsp canola oil. Add shiitake mushrooms, bok choy, and Chinese chives and stir-fry for 30 seconds.
Add another tablespoon of canola oil and the cooked longevity noodles. Gently stir-fry for an additional 30 seconds, making sure to not break the noodles.
Pour in the sauce and stir-fry until the noodles are fully coated. Add more oil if needed and salt and white pepper to taste.
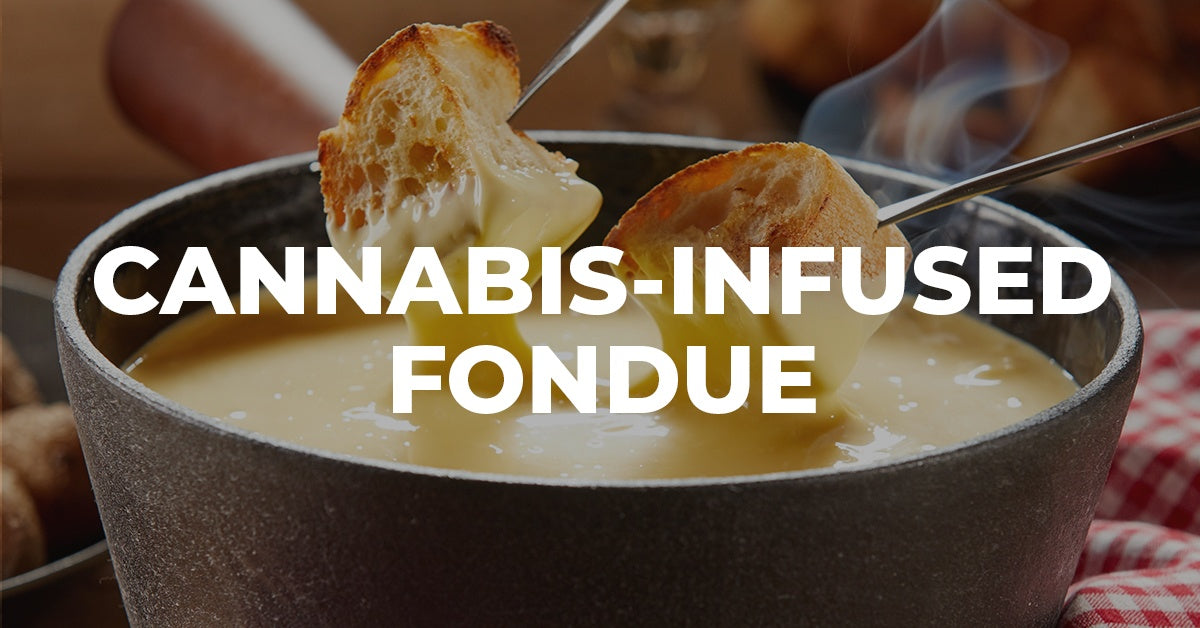
Did you know that fondue came to be in Switzerland? The word fondue translates to “to melt” in French. And that, it does. Both in the traditional way, with cheese, or in the American way, with melted chocolate.
In the 18th century, fondue was a solution for hungry families to repurpose their inedible crusty bread and old cheese – giving it new life as they waited out the winter months for fresh harvests.
Today, ski resorts and lodges serve fondue as a delicious wintery snack to warm the body and soul. Now, we’re bringing the Alps to you. Learn how to prepare, make, and serve delicious fondue right inside the Ardent FX.
How to get started
First, activate your material in the Ardent FX, using the A1 setting for THC-rich material and A2 for CBD-rich material.
Crakers, chopped bell peppers, crusty bread chunks, and cherry tomatoes for serving
1-3 grams decarboxylated cannabis flower, ground
https://vimeo.com/510461602
How to make cannabis-infused fondue:
Preheat your FX on the bake setting and rub the garlic (chopped side outward) along the bottom and sides of the inner FX.
Boil your vegetable stock and pour it in the FX, or allow it to heat in the FX for an hour. Add the champagne vinegar. Allow it to begin bubbling.
While you’re waiting, create your dipping board with crackers, bread pieces, sliced bell peppers, and other veggies. Place them on skewers as desired.
Add cornstarch to your shredded cheese, along with decarbed herb. Mix and begin placing the cheese in the FX a handful at a time, making sure each handful is fully melted before adding the next. Stir regularly with your spatula. Serve in the FX on the bake setting, and enjoy!
Indulging in our fondue recipe during your winter staycation? Tag us on Instagram for the chance to be featured on our page!
If you want to step out of the box this Valentine’s Day with a delicious, infused experience, our Valentine’s Day cakesicles will take you there. A bit different from this holiday’s traditional chocolate-covered strawberries, which you can also infuse, by the way, this unique treat will definitely get you some brownie points.
Whether you’re making these upgraded cake pops with your Valentine or by yourself, you’ll be sure to feel the love like a nice, warm hug, as soon as the edible hits.
Equipment you’ll need:
Cakesicle molds
Popsicle sticks (wooden or re-usable metallic ones work well)
Cellophane wrappers (for distribution and storage)
Medium for decarboxylation: Ardent Nova, Ardent FX, oven, etc.
Ingredients:
Boxed cake mix of your choice (we like red velvet for these)
1 ¼ cups water (or per box’s instructions)
½ cup cannabis-infused vegetable oil (or per box’s instructions)
3 eggs (or per box’s instructions)
1-2 tablespoons of cream cheese frosting (if making this from scratch, use cream cheese, softened butter, confectioners sugar, and vanilla extract)
Bake a cake using the cannabis-infused canola oil.
Once cooled, break the cake down with your hands in a mixing bowl until it’s nice and crumbly.
Add 1-2 tablespoons of frosting to the crumbly cake mixture and form it into a cake ball.
Coat your cakesicle molds with melted white chocolate, push the popsicle sticks inside, and then place them in the refrigerator for 5 minutes.
Take out the molds, remove the popsicle sticks, and patch up any spots missing the white chocolate coating. Push the popsicle sticks back inside. Cool in the refrigerator for an additional 5 minutes.
Remove the popsicle sticks. Then, take a bit of the cake ball mix and stuff it inside the chocolate molds, being sure not to overflow it. Place the popsicle sticks back inside, piercing the cake ball.
Coat the top of your cakesicle molds with a layer of chocolate. Repeat if needed. Refrigerate for an additional 5 minutes and remove from the molds on to parchment paper to begin decorating.
Drizzle remaining melted chocolate over portions of the cakesicles by rotating a spoon quickly from side to side. Add sprinkles and additional decorations as desired.
Wrap cooled cakesicles in cellophane wrappers and store in the freezer or refrigerator for best results.
Trying out our infused cakesicles this Valentine’s Day? Tag us on Instagram for the chance to be featured on our page.
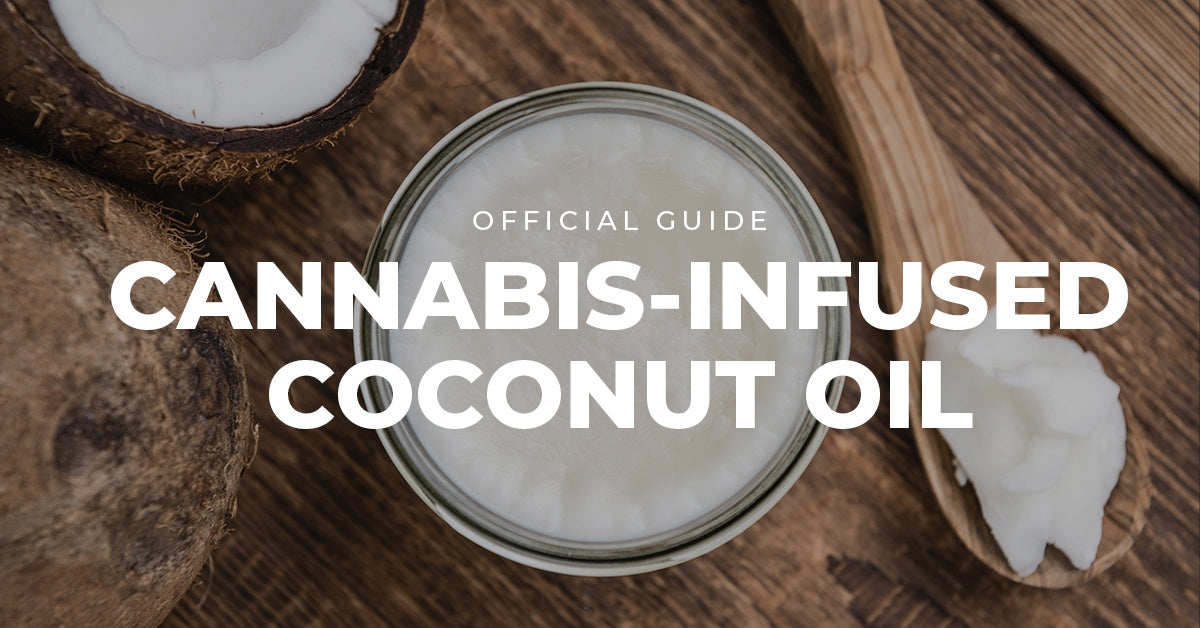
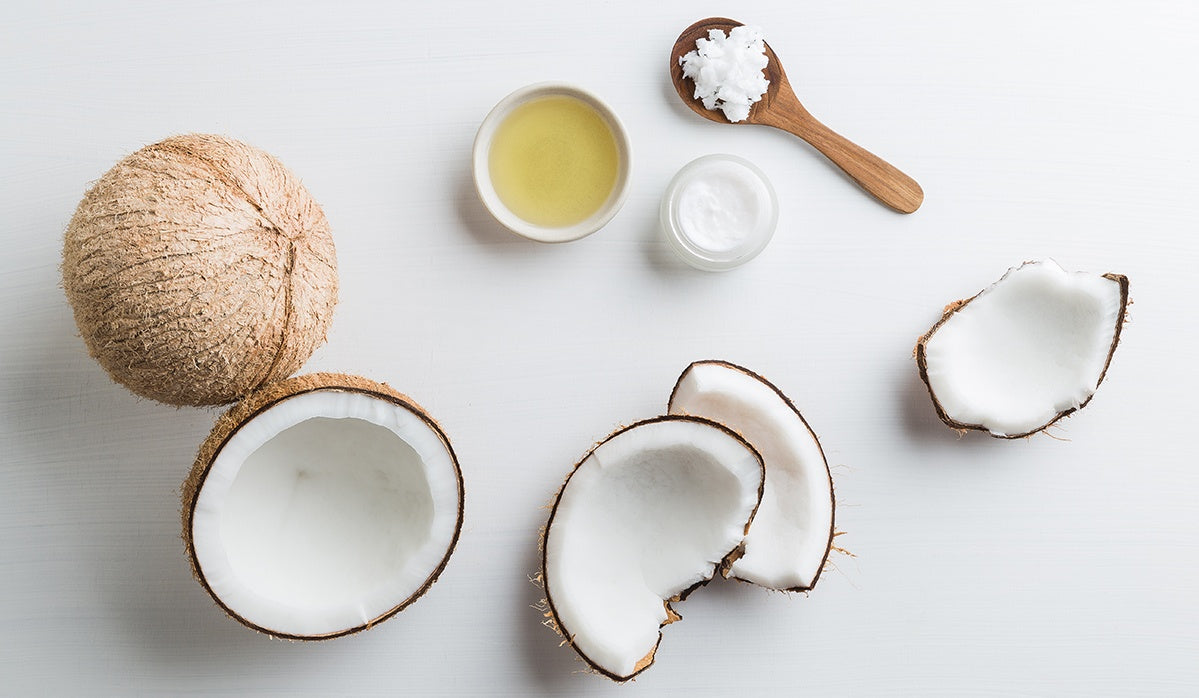
If you’re looking to make cannabis coconut oil, you’ve come to the right place! Here, we’ll show you how to make cannabis coconut oil through a tried and true recipe, as well as share more helpful information about infusing with coconut oil.
Canna-coconut oil is a great vegan or dairy free alternative to cannabutter, and is very popular because it can be used as an ingredient in just about EVERYTHING – including skincare products, hair care products, and of course, in cooking and baking. That’s because it’s full of healthy fats, which makes it an especially great source for infusion.
We’ve outlined our go-to methods for making weed coconut oil below, so next time you give it a try, the process is as smooth and effective as possible.
Ready to learn how to make cannabis coconut oil? Keep reading!
Decarboxylation method such as Ardent’s FX, or Nova decarboxylator (if you want to get the absolute most out of your THC or CBD), or an oven, crockpot, toaster oven
1 oz coconut oil (choose between virgin unrefined, refined, or MCT oil)
1 gram of cannabis flower. Note: you can also use less or more depending on your tolerance. Feel free to instead use kief, concentrates, stems, or even sugar leaf.
For reference, 1 gram of flower at 23% THCA will yield roughly 200 mgs of THC after precision decarboxylation. If you are using an oven, toaster oven or crockpot, you will be losing on average 30-40% of the final THC or CBD.
Go a bit easier when using kief or concentrates, as kief is about 40x stronger than flower, and concentrates generally lie between 60-80% potency per gram. You can typically check the potency on the lab test of the product you purchased at a dispensary.
Preparation Instructions for Canna Coconut Oil
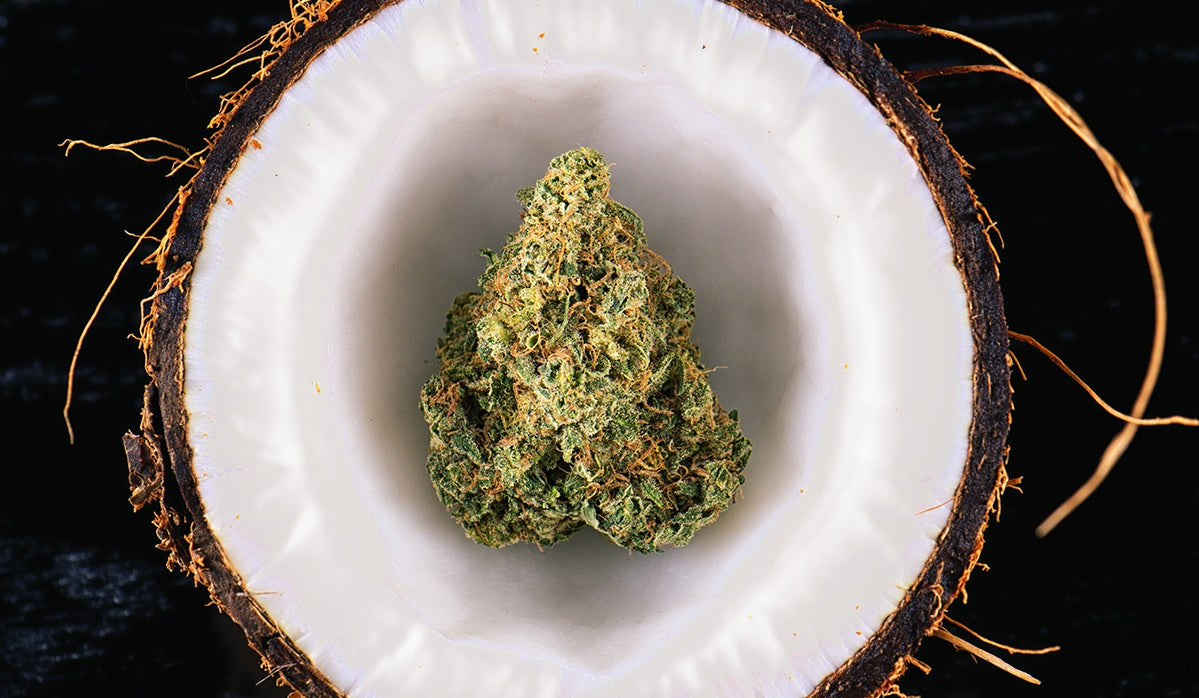
Choosing your Infusion Material
Your first step will include choosing which strain and starting material you’d like to utilize for your infusion. As mentioned, you can decarb flower, kief, concentrates, and even plant parts like sugar leaf and leftover stems to capture and activate any remaining cannabinoids that would’ve otherwise been left behind. The type of material you choose will help determine how potent your infusion will be.
Dosing
When making cannabis-infused coconut oil, you want to be sure you’re aware of how strong it is, and how much of it you’re using in each recipe. One way to be sure of your dose is through making a small batch, using only what’s needed for a single recipe, weighing your material to ensure you’re using the proper amount. It is easier, however, to make larger batches and use it little by little in a few different recipes.
We have a full detailed post to teach you how to accurately dose your material and infusions but in short, here is a simple formula to help figure out how strong your infusion will be.
First, look at your cannabis lab test to see the percentage of THCA in your material. Once you have that, we can do some simple math to calculate the milligrams (mg) of THC per gram.
When decarboxylating, you are removing the acid molecule from the THCA to convert it into THC (or in the case of CBD, decarboxylation turns CBDA to CBD – also by removing the acid molecule.)
That acid molecule weighs 13% of the total, so to find the total potential THC from THCA, or of CBD from CBDA you multiply the THCA or CBDA x ,87% to get the maximum amount available in the plant. In this example 23% THCA x .87 = 20% potential THC. So with precision decarboxylation in FX or Nova decarboxylator, you can get 20% THC in the final material. Note that if you use a less precise method like an oven, toaster oven or crockpot to decarboxylate, you will get between 30-40% less than the total potential THC or CBD.
Once you know the %, just move the decimal one place to the right to see how many mg of THC per gram.
Here, the 20%, move the demimal one over, 20.0 = 200 mgs
Your plant material now contains about 200 mg activated THC after decarb in FX, or Nova decarboxylator.
Choosing Your Coconut Oil
Next, you want to choose which type of coconut oil is best for you!
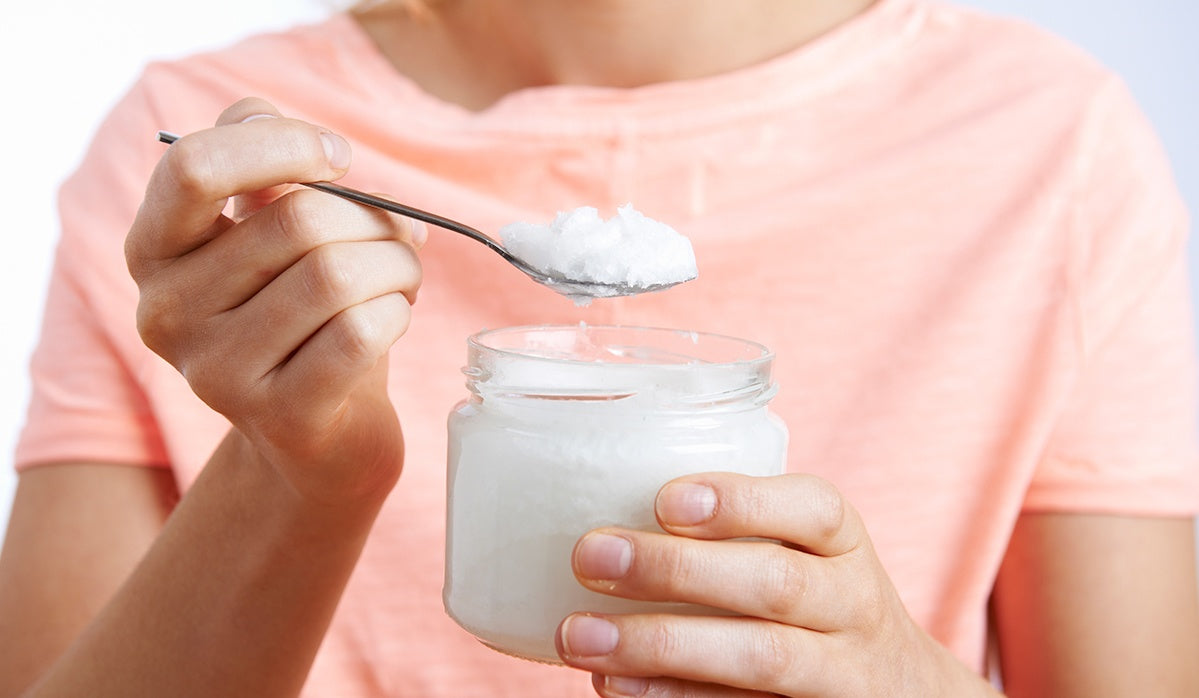
Virgin Coconut Oil
Virgin, unrefined coconut oil, which can be found in most grocery stores, contains natural oil created by cold pressing coconut meat. It often tastes strongly of coconut. It has a solid consistency in cooler temperatures and turns to liquid in warm environments or when heated.
Refined Coconut Oil
Refined coconut oil is a more processed version of the above coconut oil. It often tastes a bit less like coconut than it’s virgin, unrefined counterpart. It also fluctuates between solid and liquid depending on the temperature.
MCT Oil
MCT oil is a clarified version of coconut oil. MCT stands for medium-chain triglycerides, which are fats pulled from coconuts. MCT oil has no discernable taste and comes only in liquid form.
Decarboxylation is essential for activating your material and prepping it for infusion, which in turn, helps with bioavailability. Without decarboxylation, your THC and CBD will still be in the acid form, and you won’t get the effects that you are expecting from THC and CBD.
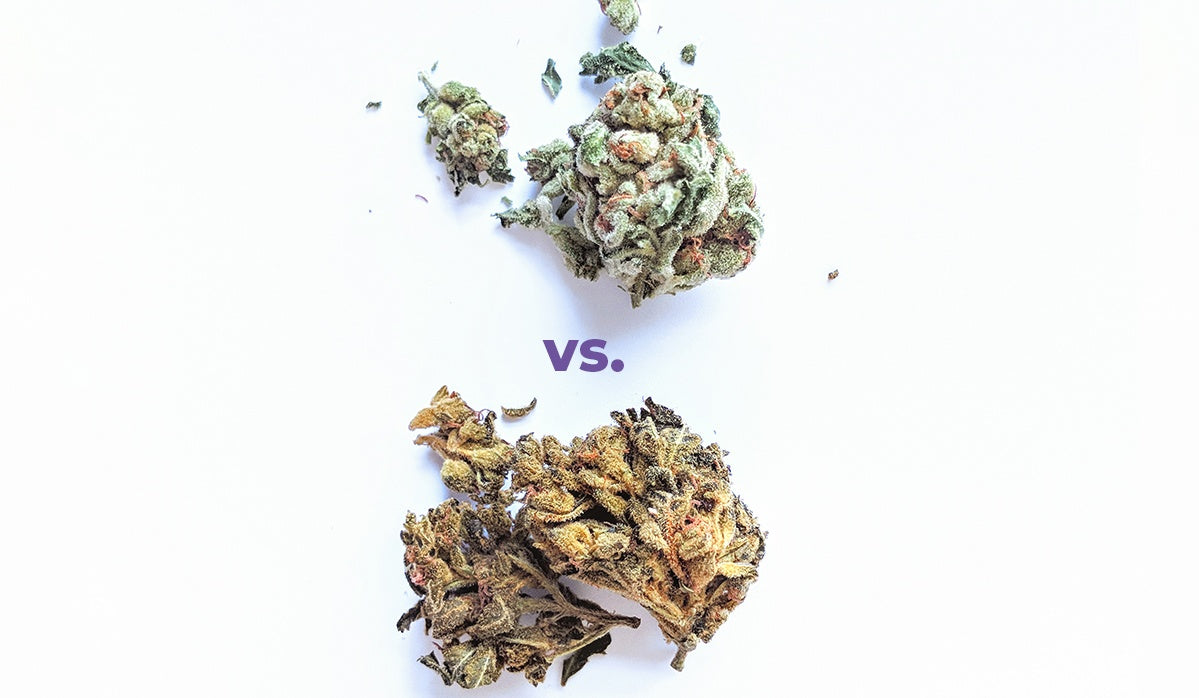
Step 1: Decarboxylation
A great way to prepare for making a batch of weed coconut oil (at any time) is by decarboxylating your material in advance, then putting it in an air-tight container and storing it in a dark, temperature controlled place, such as a drawer, cupboard, or other safe place away from pets, children and the like. Decarbed flower stored properly can last longer than you might expect.
Oven Decarb
To decarb in the oven, you’ll need a cookie sheet and some parchment paper.
Preheat your oven to 240 -260 degrees.
Grind your 1 gram of cannabis up and spread it evenly across the parchment paper. (You can use more cannabis or less here depending on your tolerance and what your final recipe calls for.)
Place your cookie sheet on the center rack and allow your bud to activate for 40 – 60 minutes.
Our test results show that oven decarb loses about 30-40% of cannabinoids – temperature fluctuations and harsh heating elements lead to an imprecise process.
The process is also one of the least discreet, and you should be mindful of your neighbors, any children, and other folks with sensitivities who might be sharing your space.
Toaster Oven Decarb
Prepare your cannabis in the same way as outlined above for the oven.
Place a sheet of parchment paper on a cookie sheet.
Grind your 1 gram of cannabis up and spread it evenly across the parchment paper.
“Toast” your herb at 220 -240 degrees for 60 minutes.
Our test results show that toaster oven decarb loses about 30-40% of cannabinoids – temperature fluctuations and harsh heating elements lead to an imprecise process.
Another less than discreet method, the toaster oven provides a lot of cannabinoid loss, and is not ideal for decarboxylation, but will work in a pinch for a bit of activation.
Ardent Technology
The Ardent Nova and FX are precision decarboxylators perfect for folks decarbing for personal use such as making cannabis coconut oil. With patented heating technology that wraps around the entire decarboxylation cavity coupled with dual precision sensors and a precision decarb algorithm, there is no minumum amount you can decarb, and no worries about losing precious cannabinoids.
For the Nova: Place your 1 gram of cannabis flower inside the Nova and press the power button. (Decarb time including heat up and cool down will be approx 1 hour 45 min.)
For the FX: place your 1 gram of flower inside, choose the A1 setting for THC, and A2 setting for CBD, then press the power button to start. (Decarb time will be just over an hour)
The Ardent FX can hold and decarb up to 4 oz. of flower, kief, or concentrates!
Both devices allow you to achieve over 97% activation in each and every cycle PLUS give you infusion capabilities directly in-unit.
Ardent technology is both the easiest and the most effective way to make a cannabis coconut oil recipe, whether you’re at home or on-the-go.
Now that you have your material activated, we can move on to the next step!
Step 2: Infusion
Now, it’s time for infusion! Throughout the infusion process, you want to be sure that the temperature of the mixture doesn’t climb above 300 degrees. The simplest way to infuse is to simply pour your oil over the decarbed material inside FX or Nova. You can then run a second cycle (same button as the decarb function on the Nova – for FX you can infuse on the A1 setting or the Infuse setting depending on your preference for a higher temp or lower temp infusion).
If you don’t have an FX or Nova decarboxylator, you can make due with a manual or digital cooking thermometer along with your stovetop.
The amount of coconut oil you’re infusing matters a LOT. The less oil you use, the more potent your infusion will be. Just the same way that the more plant material you use, the stronger it will be. If you are using one gram of flower, we recommend starting off with one ounce of oil. If you are using one cup of oil, 7-8 grams of decarbed flower is a good place to start. If your end infusion is too strong, you can mix in non-infused oil to make it less potent. If your infusion not strong enough, you can infuse the oil again with fresh decarbed material with a process called infusion boosting.
Crockpot or Pressure Cooker Infused Coconut Oil
To make cannabis infused coconut oil inside a crockpot or pressure cooker, you’ll need to tie up your decarbed herb into a cheesecloth using a rubber band. Then, place your decarbed bud inside the crockpot and pour the coconut oil of choice over top.
Allow it to infuse slowly on low heat, stirring with your rubber spatula every half hour or so.
Because there isn’t a setting for infusion on the crockpot or pressure cooker, you’ll unfortunately have to keep coming back to stir and watch your infusion.
When it’s done, ring out your cheesecloth and either save your raffinate for later, or toss the cheesecloth out.
Sous Vide Method
To make canna coconut oil using the sous vide method, you’ll need a few additional items. Some folks choose to decarb using the water displacement method; however, that results in some less than ideal cannabinoid waste, although it is discreet. If you’re using the sous vide cannabis coconut oil method, you’ll need a bucket or large pot that you can use as a water bath.
You’ll also need a cannabis coconut oil mason jar, which will contain both your decarbed herb and oil that will be slowly infused with the heat from your water bath, along with a sous vide.
Ardent Nova or FX
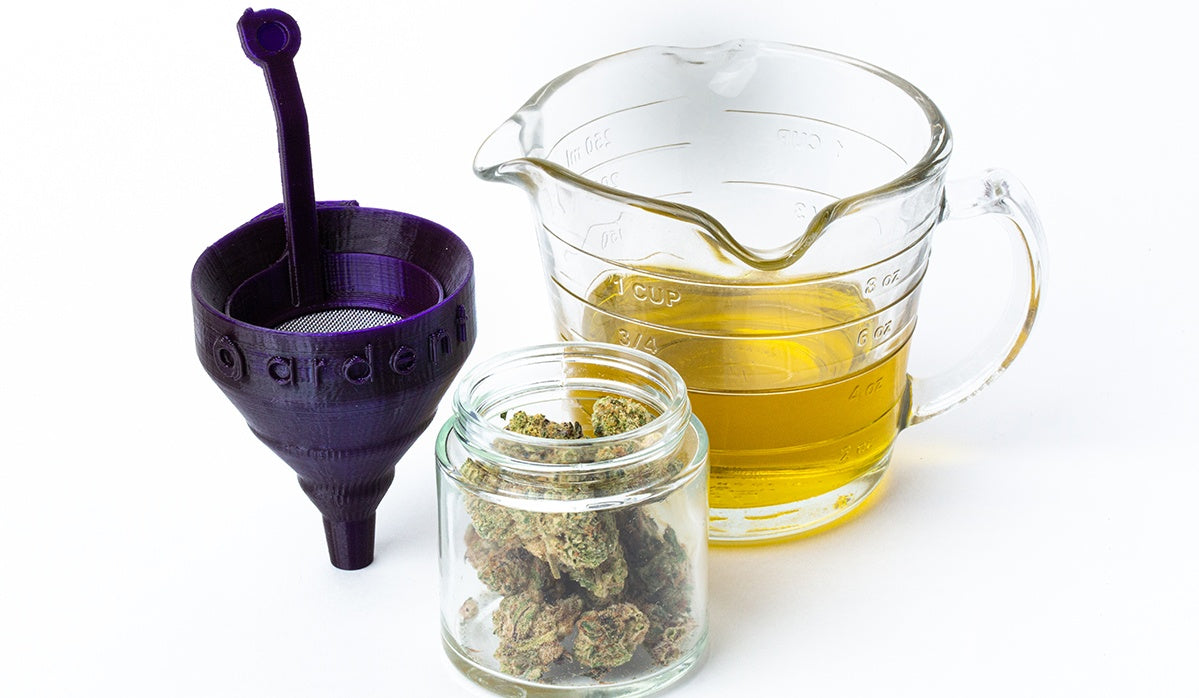
Our favorite cannabis coconut oil recipe uses Ardent technology, of course. In the Nova, combine your decarbed plant material with coconut oil and run it for another cycle. Strain and enjoy. Use the Coconut Oil Infusion Kit to make it even easier! (see video below)
To make cannabis-infused coconut oil using the FX, add your 1 gram of decarbed plant material and 1 oz of coconut oil inside the device. Adjust to the infuse setting and press the power button to start. After the infusion cycle has run, strain using the Infusion Press or Ardent’s Frainer for no-mess straining.
https://vimeo.com/509273186
No matter which way you’ve chosen, you now have your cannabis infused coconut oil!
What to do with your Cannabis Infused Coconut Oil
Now that you’ve made your cannabis infused coconut oil, there are plenty of options for what you can do with it at home!
Using infused coconut oil, almond oil, shea butter, mango butter, beeswax, and essential oils, you can make infused hand salves or whipped body creams.
Toss a bit of infused coconut oil into your morning smoothie so the thickness allows it to fully blend.
Use weed coconut oil in your coffee to make a filling bulletproof brew.
Apply your infused coconut oil directly to your scalp, cuticles, hands, and body as an instant moisturizer.
Make vegan cookies using cannabis coconut oil, peanut butter, and plant-based milk.
Ultimately, any recipe requiring coconut oil can be substituted with your newly infused oil!
Weed coconut oil nutrition information
Weed coconut oil is a plant-based solution to bioavailable infusions. This dairy-free product has about 121 calories per tablespoon, with about 13.5 g of fat per serving. Consuming cannabis coconut oil may also help you feel full longer because it’s jam-packed with natural fats.
Now that you know how to make cannabis-infused coconut oil, what’re you making first? Find plenty of uses for your infused oil on our blog, including cannabis capsules, smoothies, and even cannabis pain salve. Visual learner? No problem. Follow along with our cannabis coconut oil infusion process by watching our video here.
This winter, hot cocoa bombs have been all the rage. What better way to celebrate National Hot Cocoa Day on January 31st than with Ardent’s very own cannabis-infused hot chocolate bomb recipe?
You’ll need to acquire a mold for your hot chocolate bombs: we always prefer using silicone because it’s very easy to work with and to clean. Then, keep some chocolate melts on hand to do the heavy lifting.
Finally, you’ll need some traditional hot chocolate mix along with plenty of marshmallows and fun sprinkles. To make it an infused bomb, decarb some flower and give it a good grind afterward. Let’s go!
Decarb your flower. (If you have an Ardent FX or Nova, use the A1 setting for THC-rich material and A2 setting for CBD-rich material.) After decarbing, grind your flower and place it to the side.
Melt your chocolate wafers in the FX on the infuse setting or in the microwave for about 90 seconds. Stir until every piece has fully melted into the mixture. Using a spoon, begin coating your silicone mold with chocolate. Refrigerate for 5 minutes.
After 5 minutes, grab the mold from the fridge and start patching up any holes with the rest of the melted chocolate. Give it another round in the refrigerator for 5 minutes.
Take out your chocolate mold and begin removing each chocolate shell. Place on a sheet of parchment paper.
Divide your shells in half, leaving one side empty, and putting 2 tablespoons of hot chocolate mix, some mini marshmallows (or one large marshmallow,) some sprinkles, and a dash of ground, decarbed herb in the other half.
One at a time, place the empty half of your chocolate shells on a hot saucepan for 3 seconds and adhere the empty sides to the filled sides of the cocoa bomb.
Wrap each hot cocoa bomb in a cellophane wrapper and close with a twist tie or ribbon. Perfect for gifting or enjoying on your own!
Trying out our infused hot cocoa bomb recipe? Tag us on Instagram for the chance to be featured on our page.
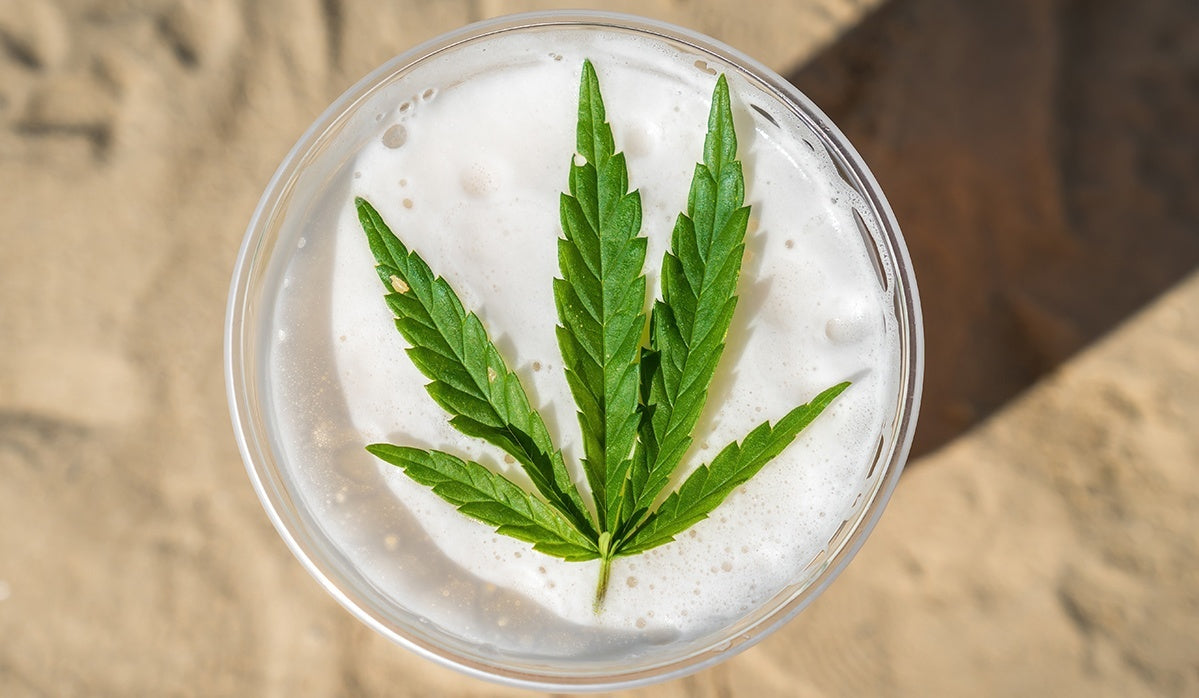
When Ardent community member Matt Roach quit drinking a few years back, he also let his self-taught micro-brewing hobby fall to the wayside; he did, however, really miss the feeling of pouring his passion into something that turned into a great product, naming his brews perfectly, and sharing a moment of enjoyment with friends and family.
Today, Matt harnesses the power of his Ardent Nova, our flagship decarboxylator, that allows Matt and others in our community to reach precision activation of more than 97% of available cannabinoids in their material.
Matt’s Process for Infused Non-Alcoholic Beer
Matt’s experimentation lead him to try making a Citra hop infusion into propylene glycol using the Nova – that’s right, a water-soluble hop infusion. Why propylene glycol? Well, because it’s food-safe and can be used to integrate cannabinoids like THC and Delta-8 THC, along with other herbs, and even heat from ultra-hot peppers.
When his fermented wort comes out, if it’s on the sweet side, he’ll be adding additional Citra and some cannabis infusion made directly inside the Nova.
What is Cali Sober?
Just like replacing hemp or cannabis smokables for cigarettes, many consumers replace their alcohol habit with seltzer, non-alcoholic beer, and other euphoric, adaptogenic mixers for mocktails in order to lead a Cali Sober lifestyle.
Cali Sober, according to journalist Michelle Lhooq, means leading a sober lifestyle except for cannabis and other psychedelics. We’ve watched the rise of the Cali Sober trend over the past few years, and only see it growing with movements like Dry January beginning to impact offerings at bars, restaurants, and even standards for social gatherings and online communities.
What we want to hear from you:
Have you ever tried a cannabis-infused non-alcoholic beverage? Did you ever make your own? What’s your strategy?
Follow along with Matt’s brewing journey and hear from other members of the Ardent community, where they chat about the hottest recipes and experiments happening in their kitchens, by joining our Owners Group on Facebook.
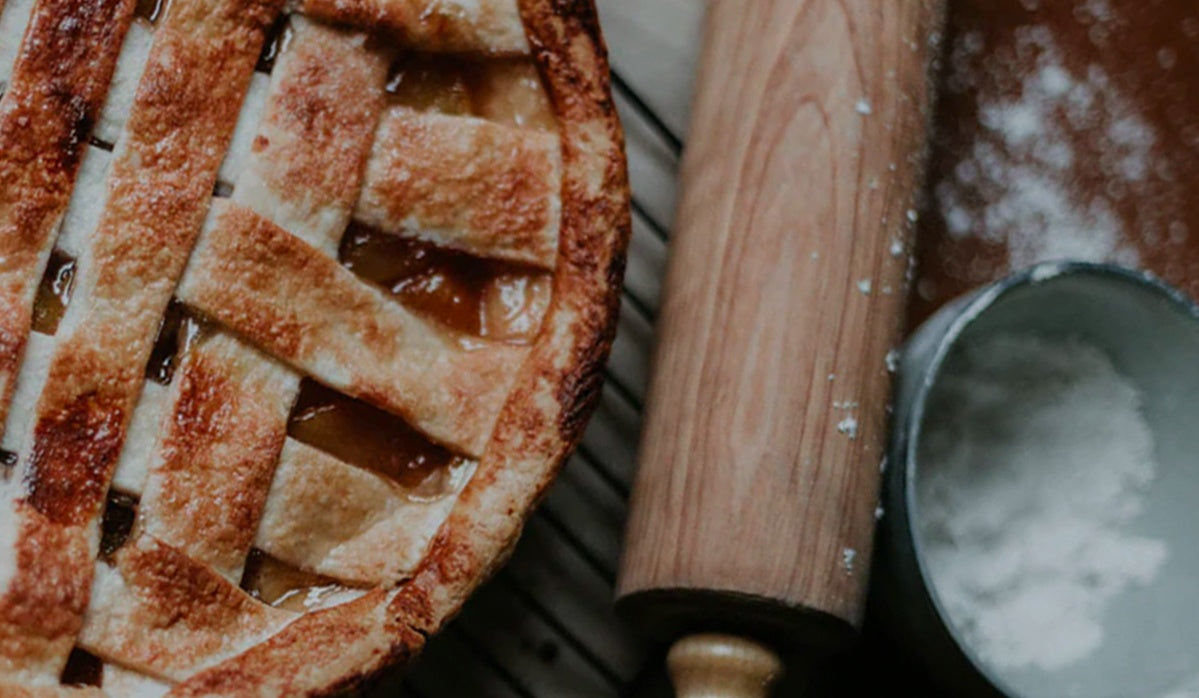
Apple pie is a beloved, all-American favorite dessert enjoyed year-round. Like most other foods, we think apple pie is much more enjoyable when it’s infused with cannabis.
Today, just in time for National Pie Day, we’re teaching you how to make cannabis-infused apple pies both from scratch, and a recipe using Ardent’s precision decarb, infusion, and baking technology.
Choosing your cannabis-infused base for pie crust is generally a matter of preference. Usually, a good pie crust uses butter and vegetable shortening, but you can also use coconut oil to make a plant-based version.
If you have some cannabutter in the fridge, you can always cut the recipe with some non-infused butter to tone down the dose.
Apple Pie Ingredients You Can Infuse
With infused apple pie, you have the option, of course, to just toss decarboxylated cannabis into your apple pie filling to make an “instant edible” of sorts. This is a great option for folks using a store-bought crust.
You can also make a weed apple pie with an infused crust – just have your cannabutter, infused shortening, or cannabis plant-based butter and oil on hand. If you’re feeling adventurous, you might want to infuse both the filling and the crust, or you can infuse one with CBD and the other with THC to mix it up.
How to Dose Your Weed Pie
The most educated way to dose your marijuana pie is by knowing the percentage of THC or CBD in your starting material. If you’re buying your cannabis or hemp from a dispensary, this should be written somewhere on the label or COA.
With Ardent’s precision decarboxylation technology, each cycle activates between 97-100% of available cannabinoids in your material.
A good rule of thumb for calculating dose is to move the decimal point one space to the right. For example, if you’re starting with 1 gram of plant material at 18.2% THC, your infusion will result in about 182 mgs of activated cannabinoids.
If you’re using previously infused butter or oil, you might want to consider how much of the butter your recipe will call for. For example, if you made a large batch of cannabutter and your pie recipe only calls for ¼ of it, you may want to consider infusion boosting to make it a bit stronger. The same applies in the opposite direction: if your recipe calls for cannabutter and you made your batch a bit too strong, use a portion of your infused butter combined with a portion of non-infused butter.
Our Favorite Homemade Apple Pie Recipes
Easy Semi-Homemade Infused Apple Pie Using Frozen Crust
Ingredients
2 9” frozen (thawed) pie crusts
1/4 cup flour
1/4 cup white sugar
1/2 cup brown sugar
1/2 teaspoon ground cinnamon
1/2 teaspoon ground nutmeg
1/4 teaspoon allspice
1/4 teaspoon salt
1 egg
4 peeled and cored green apples
3 grams of ground, decarboxylated cannabis
Directions
Preheat oven to 425 degrees.
Add flour, white sugar, brown sugar, decarbed cannabis, and spices in a large mixing bowl. Add apples, making sure they’re fully coated.
Pour your infused apple pie filling into your thawed crust, and top with another pie crust, slicing off extra edges and pressing them together.
Carefully, using a knife, cut a few slits into the top crust.
Whisk your egg, and slowly brush the top crust with your egg wash.
Add an aluminum foil ring around the edges of your crust, and allow it to bake for 40-45 minutes.
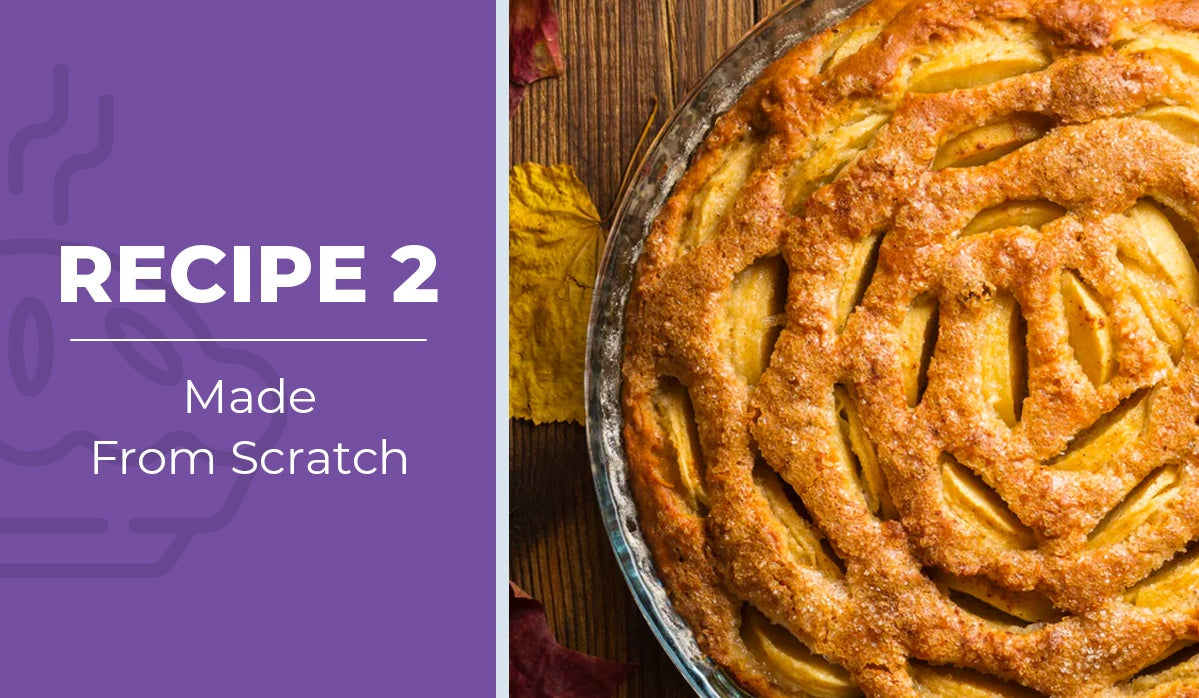
From Scratch Infused Apple Pie
Crust Ingredients
2 1/2 cups flour
3/4 teaspoon salt
1/3 cup vegetable shortening
8 tablespoons cold cubed cannabutter
8 tablespoons ice water
Apple Filling Ingredients
8 cups Granny Smith or Honeycrisp apples, peeled, cored, and sliced
2 tablespoons lemon juice
1/4 cup white sugar
1/2 cup brown sugar
2 tablespoons flour
2 tablespoons cornstarch
Dash of salt
1 teaspoon cinnamon
1/4 teaspoon nutmeg
1/4 teaspoon ginger powder
1/4 teaspoon nutmeg
1/4 teaspoon clove
1/4 cup apple cider
2 teaspoons vanilla extract
2 tablespoons cannabutter
Directions
In a large mixing bowl, whisk together flour, salt, and vegetable shortening.
Little by little, begin mixing in the ice water until it’s formed a solid ball of dough. Place on a piece of parchment paper and knead it a few times before dividing it into two parts.
Wrap your dough in plastic wrap, and refrigerate for an hour.
In another bowl, add apples, lemon juice, flour, cornstarch, sugars, salt, and spices. Mix well.
Add vanilla extract and apple cider to your mixture and combine.
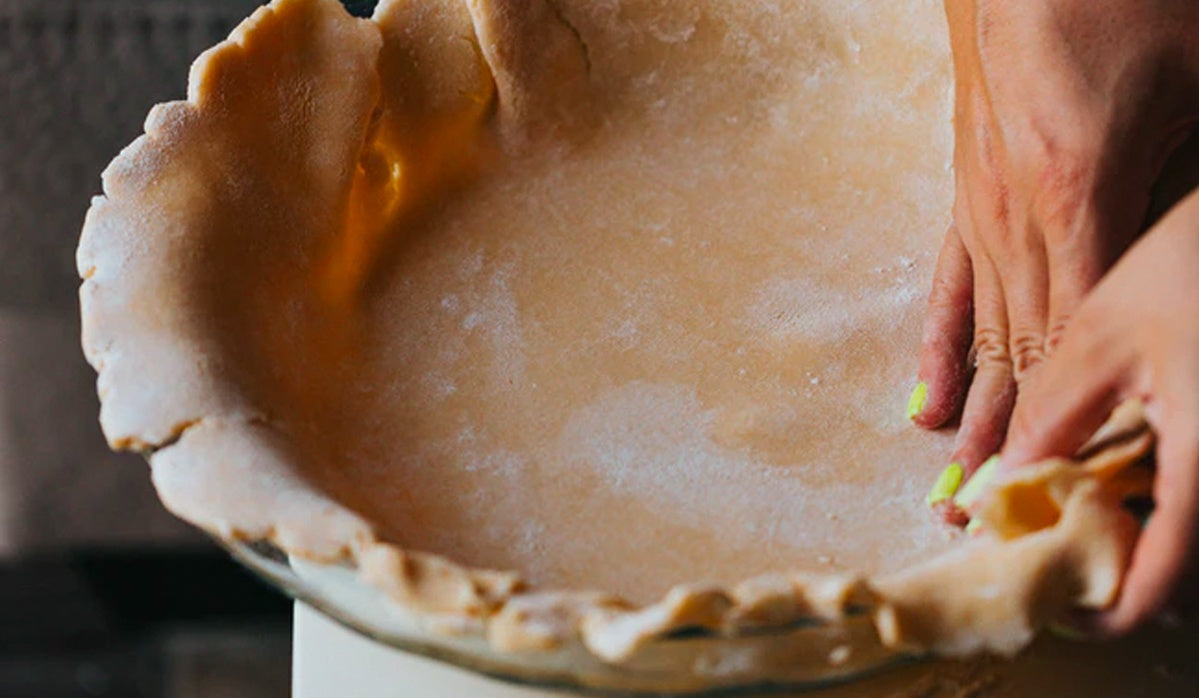
Roll out your bottom pie dough, spray your pie pan with nonstick cooking spray, and place your dough in the pie pan. Roll out your top pie dough and place it to the side.
Fill your bottom pie crust with the spiced apple filling mixture, and place a few chunks of cannabutter on top.
Place the top layer of dough over the filling and pinch the edges together, adding decorative creases around the edges with a fork, if desired. Preheat the oven to 425 degrees and place the pie in the fridge for 20 minutes before baking.
Reduce the oven temperature to 375. Allow the pie to bake for 45 more minutes, adding aluminum foil to the crust edges if it begins to get too brown.
Cool and enjoy!
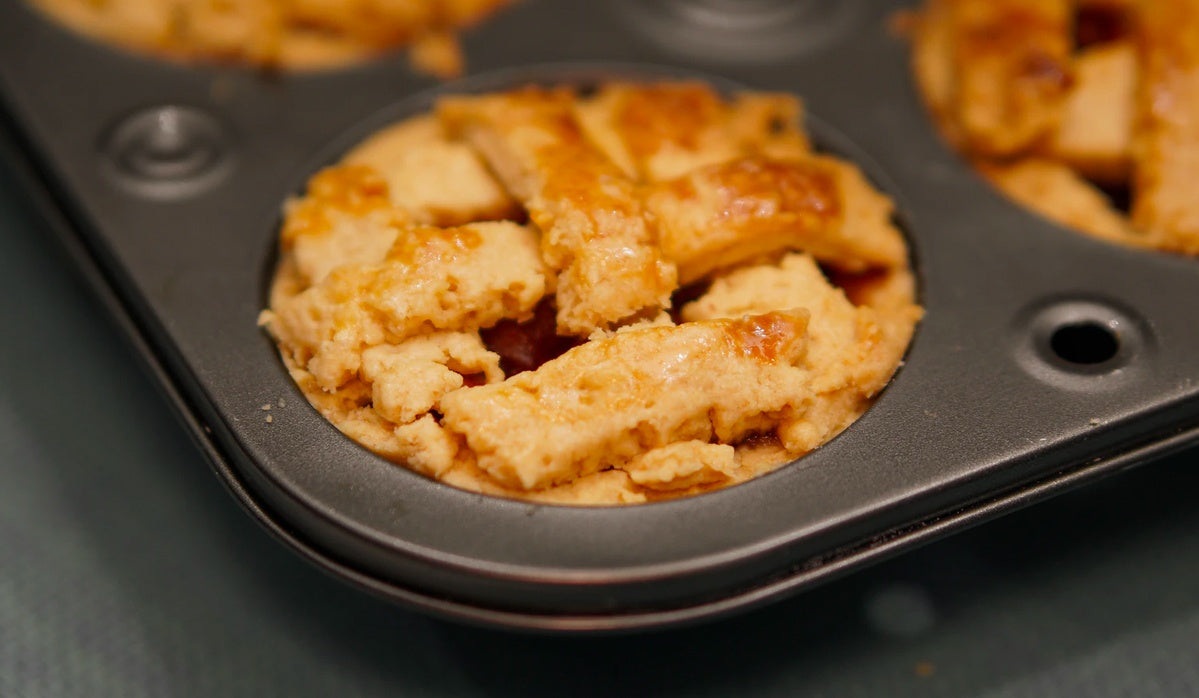
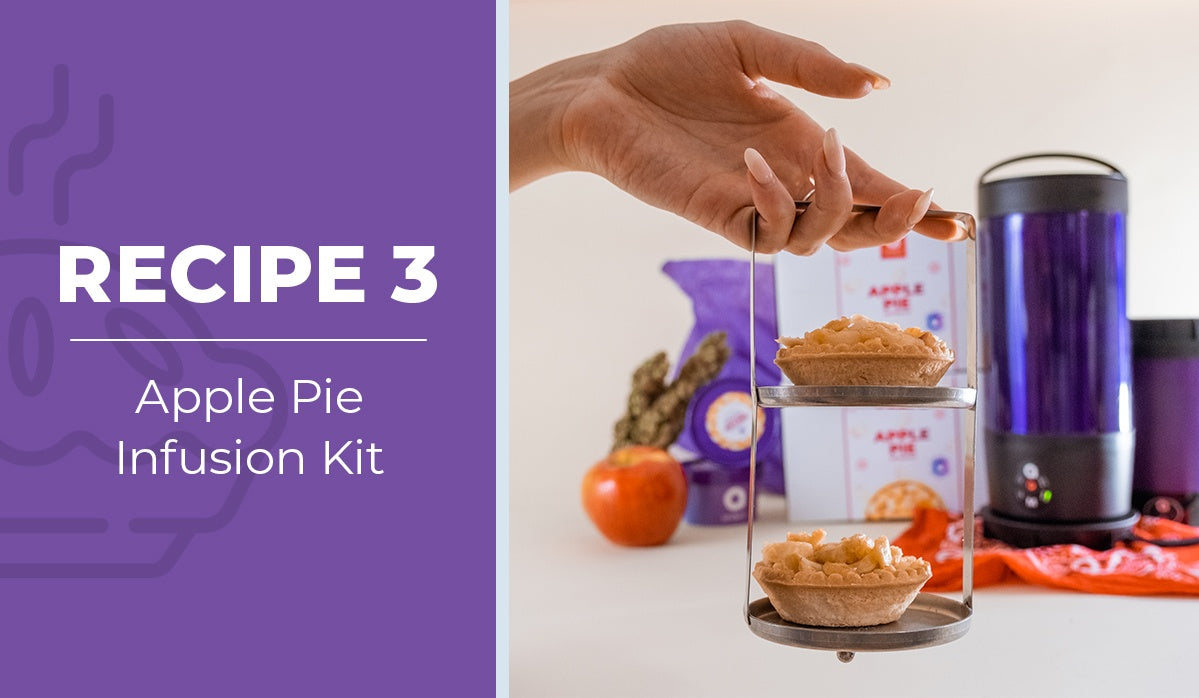
Using the Ardent Apple Pie Infusion Kit
One of the easiest ways to enjoy weed apple pie is by trying our Apple Pie Infusion Kit or the Apple Pie & FX Double Lifter Kit Bundle. Each kit comes with two 3” pie crusts, delicious gourmet apple pie filling, enough coconut oil to infuse your filling (while making things ultra bioavailable,) and a mini funnel lined with a mesh strain screen.
The bundle version comes with an FX Double Lifter to allow you to put in and take out pies easily while baking in your Ardent FX. You can bake 2 pies at once!
Ingredients
Apple Pie Mix in Ardent’s “Ready2Infuse” Cup
2 oz. of water
1 tbsp of coconut oil
Directions
Preheat your Ardent FX or Nova for 15 – 20 minutes.
Add water to the device. Let water come to just under a boil.
Add infused oil, cover and let melt for 5 minutes.
Add water/oil mixture to Apple Pie Filling in Ardent’s Ready2Infuse Cup and stir. (Alternatively, you can boil the water outside of your device and add the boiled water and infused oil directly to the Apple Pie Filling in Ardent’s Ready2Infuse Cup)
For Nova users: Empty the contents and prepare the filling directly inside your device (or your infusion sleeve). Cover and let cook for 20-25 minutes, until the apples are tender. When complete, fill your shells and enjoy!
For FX users (follow rest of instructions below): Place cup (without lid) on Lifter tray. Place Lifter into your device.
Cover the FX with FX lid, and let cook on Bake setting for 20-25 minutes.
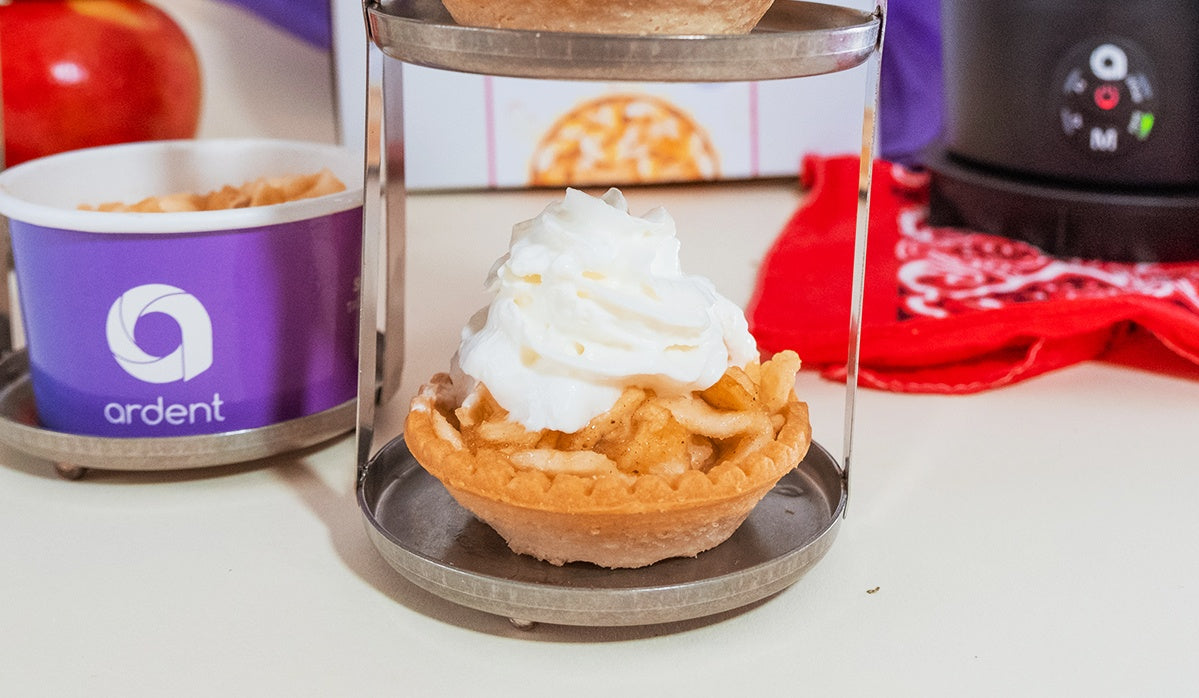
Lift out the cup and stir apple pie filling. Fill each shell with ½ of filling and place each tart on the Lifter tray and place in the device.
Strain out the raffinate using a cheesecloth or the Ardent Infusion Press. Using a mixer, combine your cannabis infused cream with 2 tablespoons of powdered sugar and ½ teaspoon of vanilla extract until stiff peaks form. Serve immediately and enjoy!
Are you trying out cannabis-infused apple pie in celebration of National Apple Pie Day? Tag us on Instagram for the chance to be featured on our page.